Where I setup the Standard C toolchain for the ATmega328P for Linux, with specific emphasis on the Raspberry Pi.
Test with the Arduino IDE!#
Note: If you have a GUI interface to your Linux PC, by all means, install the Arduino Legacy IDE (1.8.19). In the steps regarding the Raspberry Pi, the interface will be the terminal and can’t use the Arduino IDE GUI. After performing these steps on multiple machines, I’ve found it best to install and test using the Arduino IDE before going forward with the installation instructions below. This will reduce the errors to something more manageable and having the Arduino IDE is handy for its Serial Monitor as well it provides an easy method to which port the Uno is connected.
Linux Serial Permissions#
Linux also has permissions issues with its serial ports. My recommendation is this (also shown at the bottom of this page).
Linux Setup and Tool Chain Installation#
For the Linux installation, it can’t get much easier.
1. Install the tool chain#
I’ve found installing the tool chain on Debian/Ubuntu, installs a very, very downlevel version of the tools. More than likely, it will be avr-gcc 5.4, which was released in 2016. It works, however, if you use newer chips such as the “DD” or “ATtiny”, you will probably have issues.
A better solution is to install using the Arduino IDE tool chain, which is version 7.3. Use the package installer from Raspberry Pi OS, apt to install the Arduino IDE. While it will install an GUI IDE, we’ll use it in the command line. To install the tool chain, you will need to perform one simple operation:
# for 64bit OS
sudo apt install arduino
Or to get the older versions on Debian/Ubuntu: To install the tool chain, you will need to perform one simple operation:
# Bring up the command line and enter
sudo apt install gcc-avr binutils-avr gdb-avr avr-libc avrdude make git
2. Check and confirm#
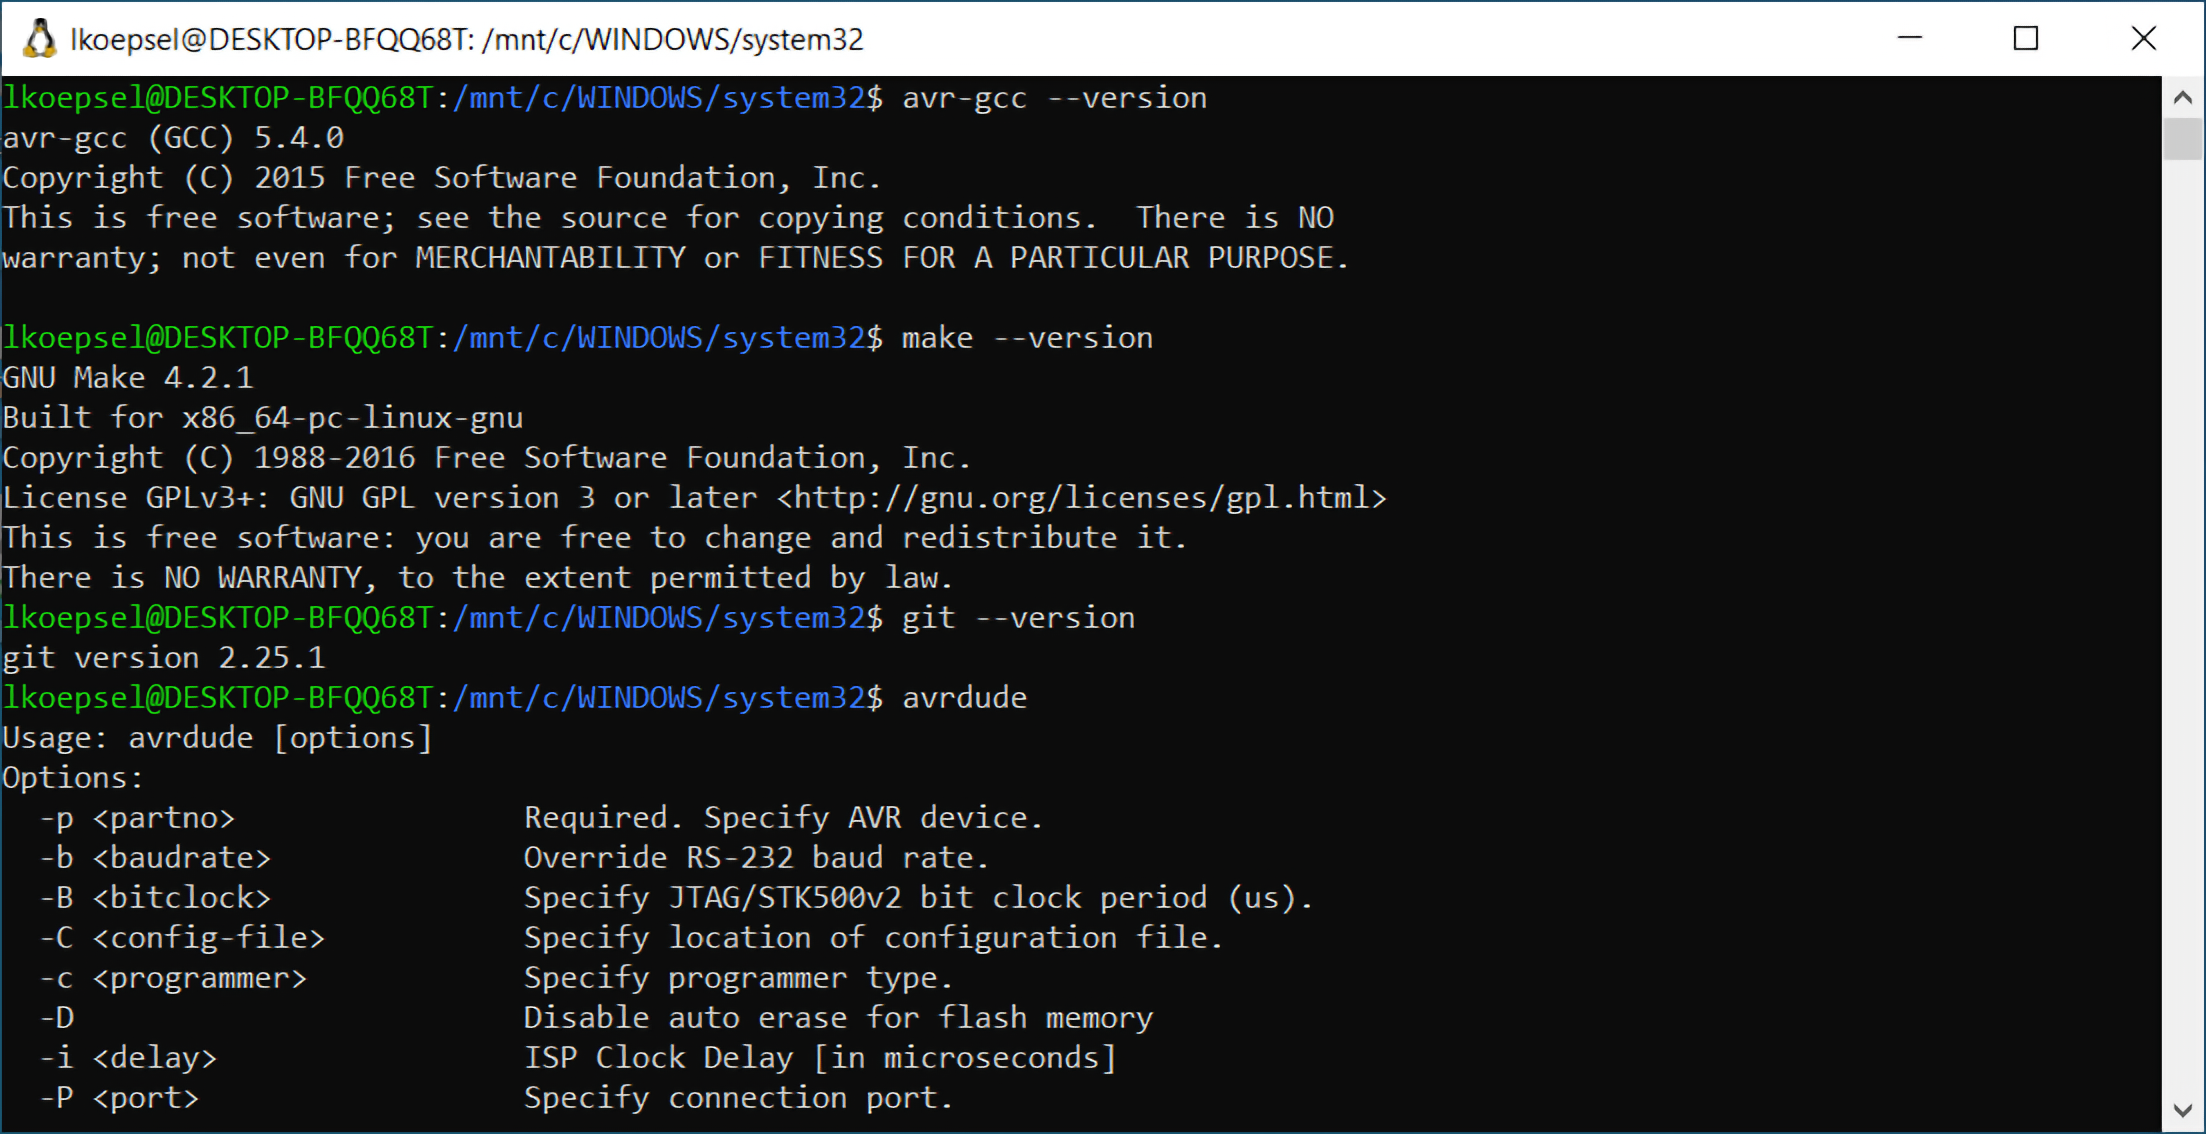
Once the installation completes, perform the following commands to confirm all applications were installed correctly. The application averdude provides a lot of output, only some is shown.
avr-gcc --version
make --version
git --version
avrdude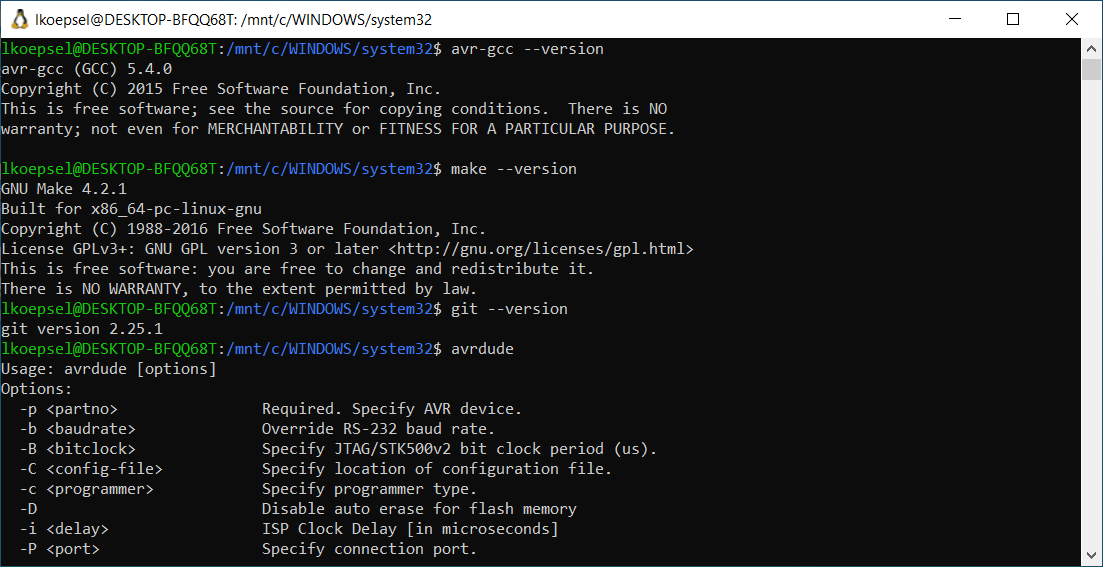
Check and Confirm the tool chain is installed
Now, we have the same capability as the Arduino IDE, however, we are able to use it via the command line!
2. Test the tool chain#
Test Code#
You will want to select the code in the box below, copy it then you will paste it into a nano editor window.
#include <avr/io.h>
#include <util/delay.h>

#define BLINK_DELAY_MS 100

int main (void)
{
 /* set pin 5 of PORTB for output*/
 DDRB |= _BV(DDB5);

 while(1) {
  /* set pin 5 high to turn led on */
  PORTB |= _BV(PORTB5);
  _delay_ms(BLINK_DELAY_MS);

  /* set pin 5 low to turn led off */
  PORTB &= ~_BV(PORTB5);
  _delay_ms(BLINK_DELAY_MS);
 }
}
Testing the Code#
In this step, we’ll setup a specific folder for developing C. I called it test. We’ll add a file called main.c, the we’ll compile/link the file on to the Uno.
cd
mkdir test
cd test
# copy the file from above and we'll call it main.c
nano main.c
# paste the file, save it and exit
Notes on the steps#
- I’m using nano as my editor to keep this simple, this will be a copy and paste from code above into a file on your system.
- Using the command cd without folder descriptor, will take you to your Linux home folder. Using cd test will take you to the new folder test you just created.
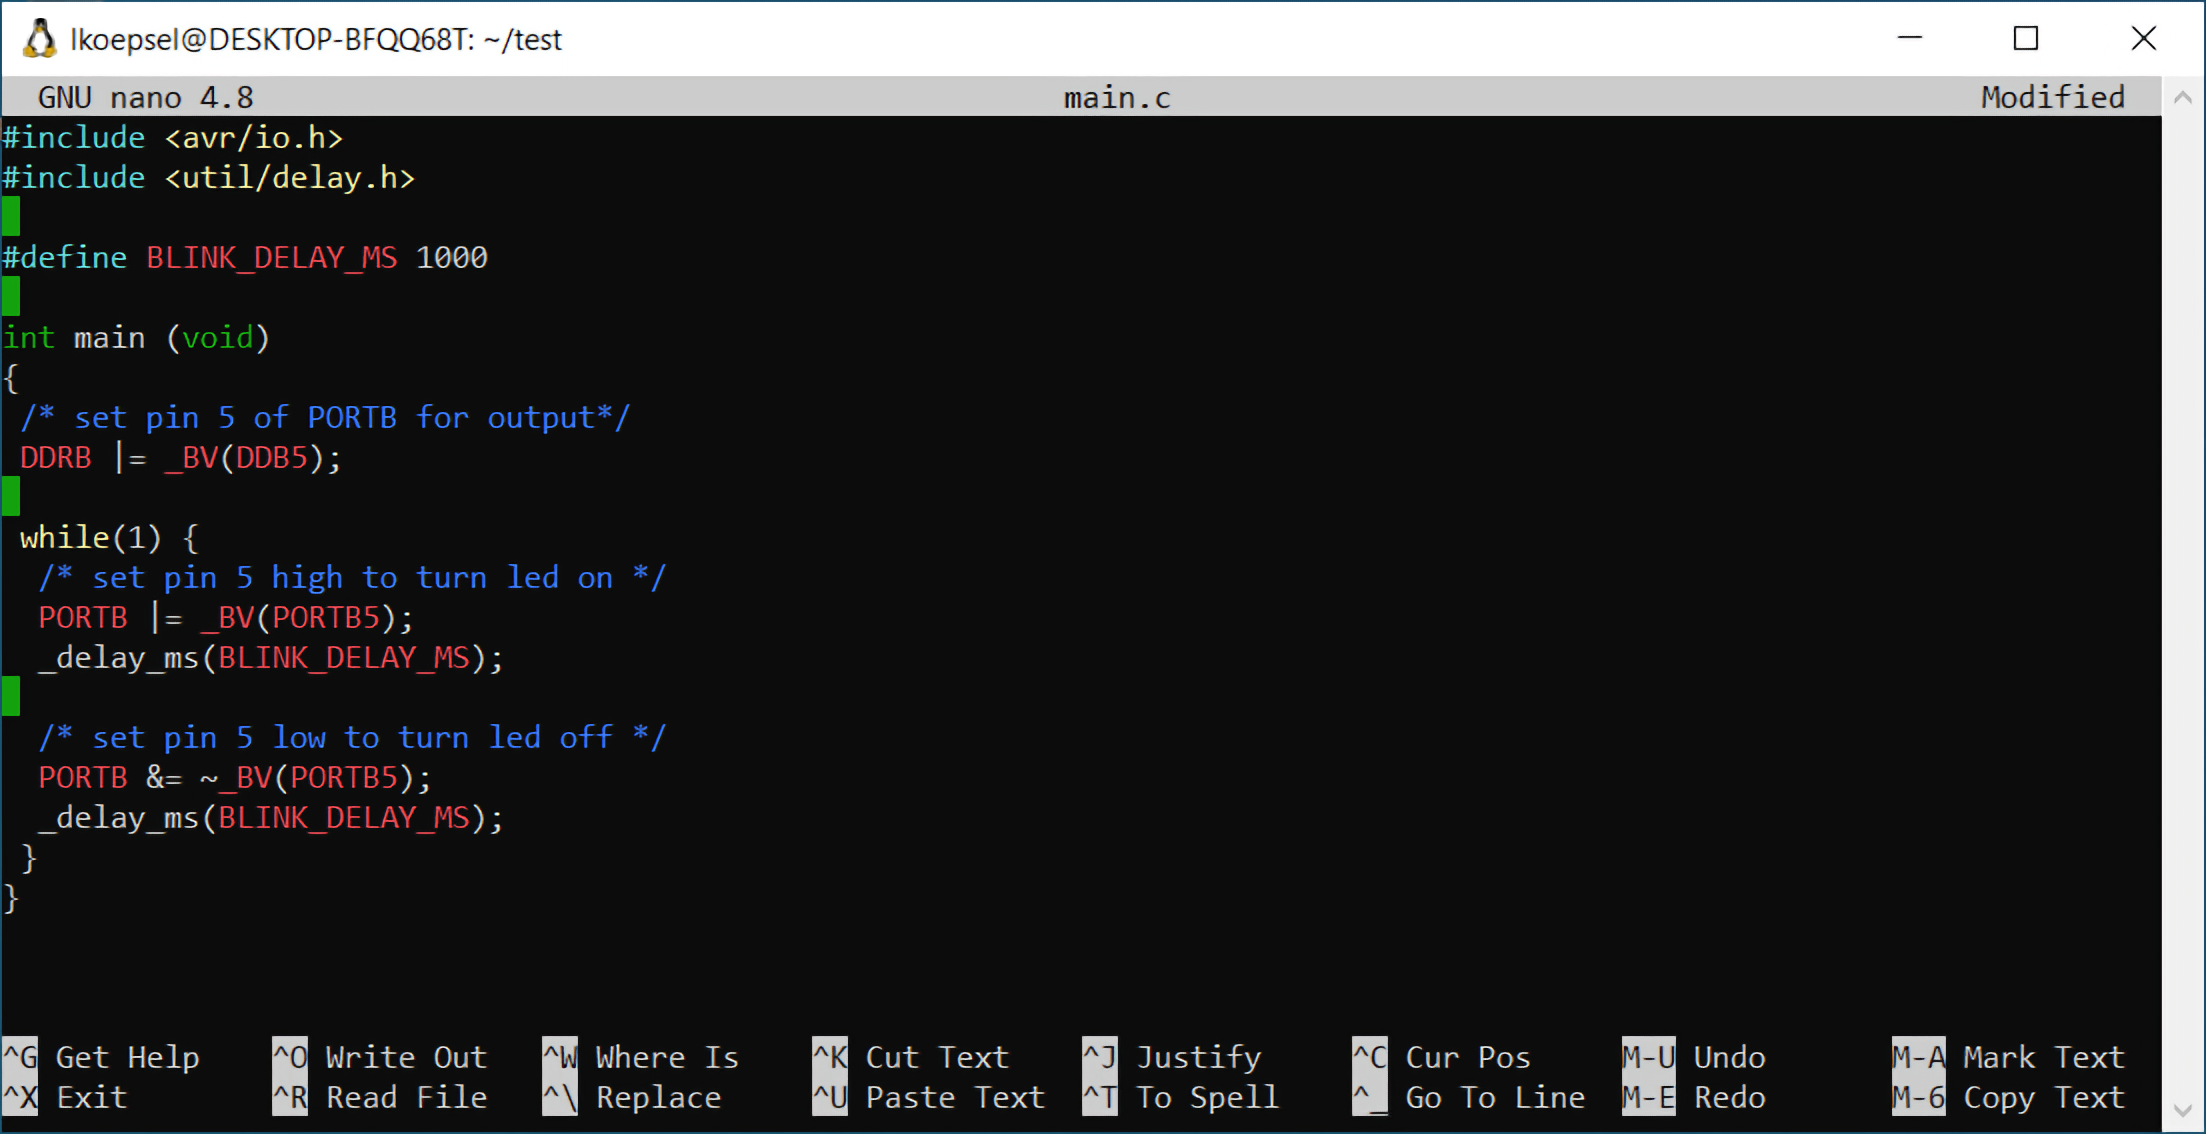
- nano main.c will open a file called main.c in the nano editor. The window will be empty as main.c is a new file. Once you paste the file into nano, it will look like this:
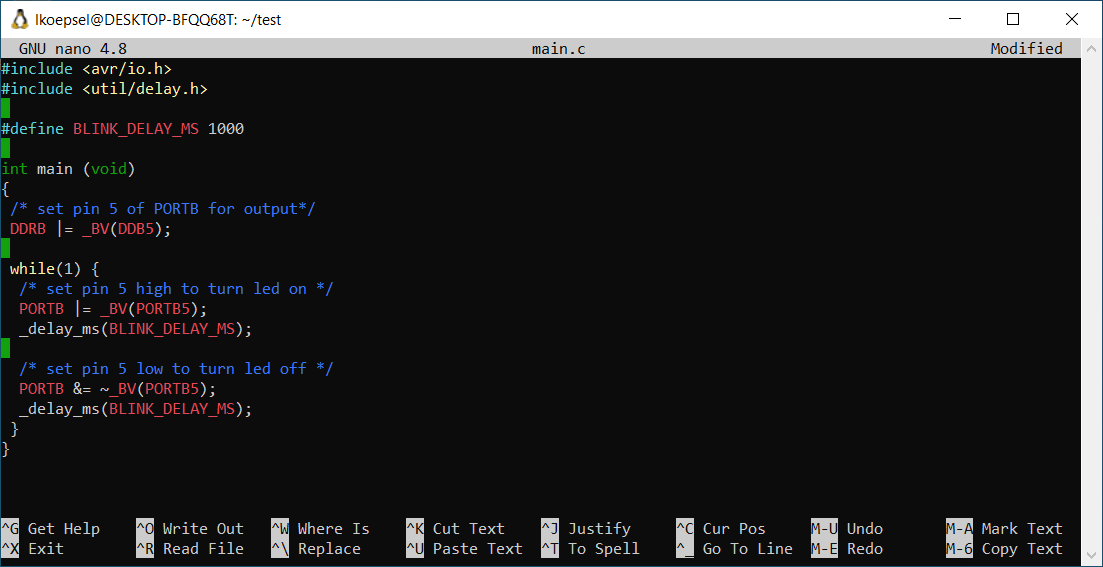
main.c in the nano editor
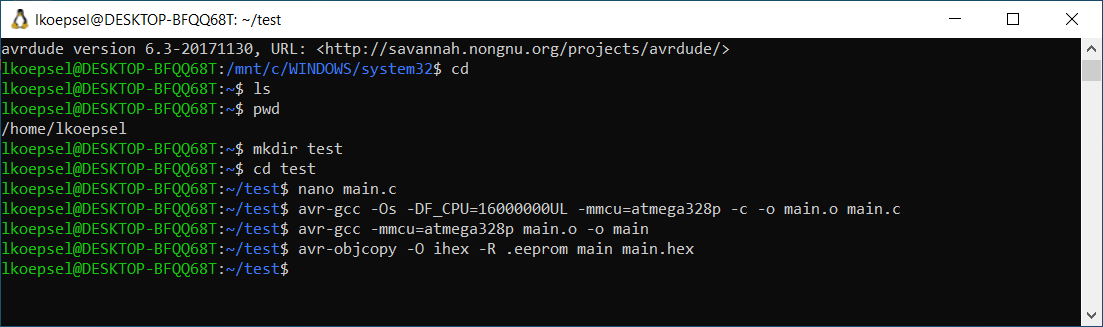
To save and exit nano, press Ctrl-X, y (to confirm saving) and Return (to confirm file name). Once you have saved the file, you will be back at the command prompt. Enter the commands below to compile/link your file.
avr-gcc -Os -DF_CPU=16000000UL -mmcu=atmega328p -c -o main.o main.c
avr-gcc -mmcu=atmega328p main.o -o main
avr-objcopy -O ihex -R .eeprom main main.hex
Your window will now look similar to this (both sets of operations shown:
main.c in the nano editor
Our last step is to load the main.hex file on to the Uno. We use averdude to upload code to the Uno. We’ll use the following command:
avrdude -F -V -c arduino -p ATMEGA328P -P /dev/ttyACM0 -b 115200 -U flash:w:main.hexNotice the "/dev/ttyACM0"? You will want to change the “ttyACM0” to the port name that you wrote down in the Arduino IDE port assignment in the earlier step Install the Arduino IDE. Note: The two versions I have seen are "/dev/ttyACM0" and "/dev/ttyUSB0".
When you run the averdude command above successfully, you will see the following:
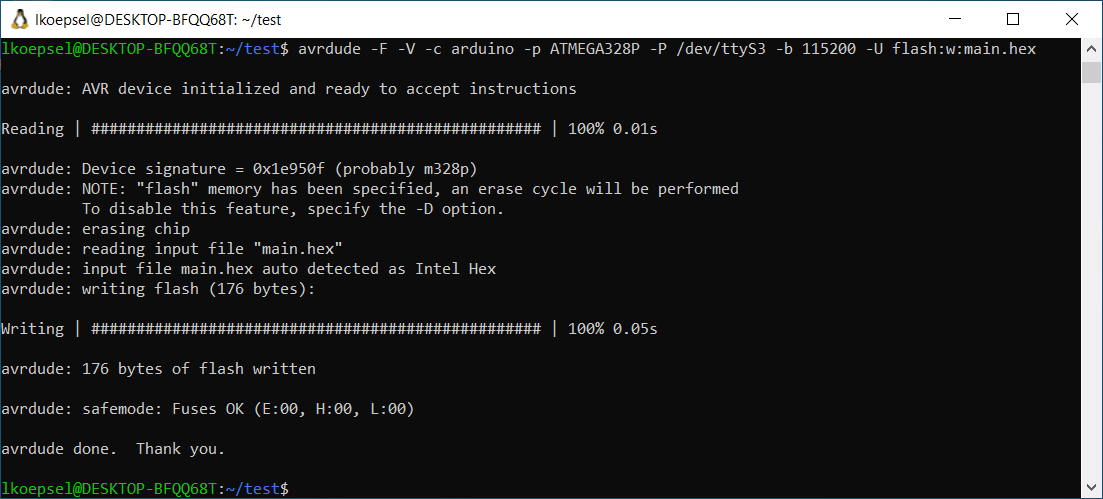
Successful averdude upload
Large Version to see detail AND your Uno will be blinking at a much faster rate!
If you see this instead:
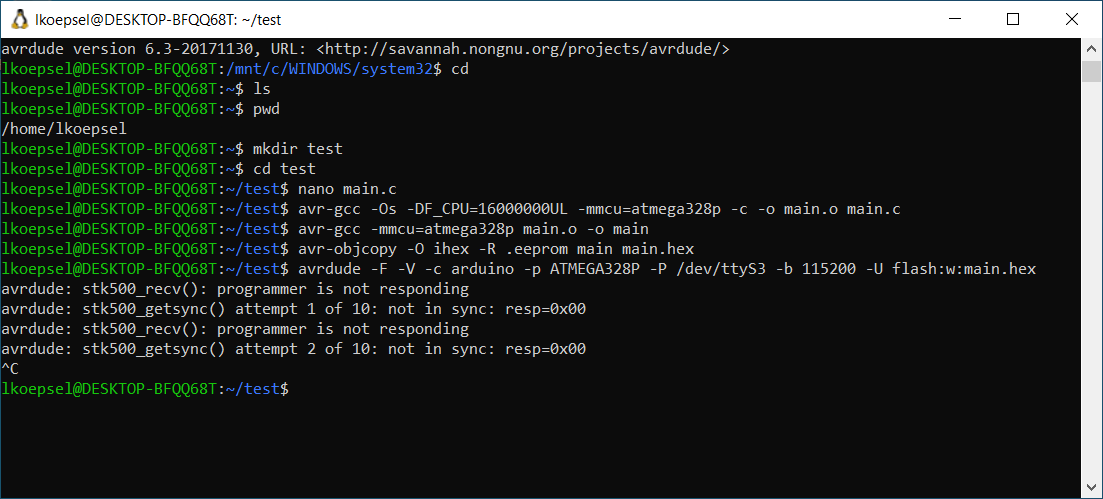
Typical averdude failure
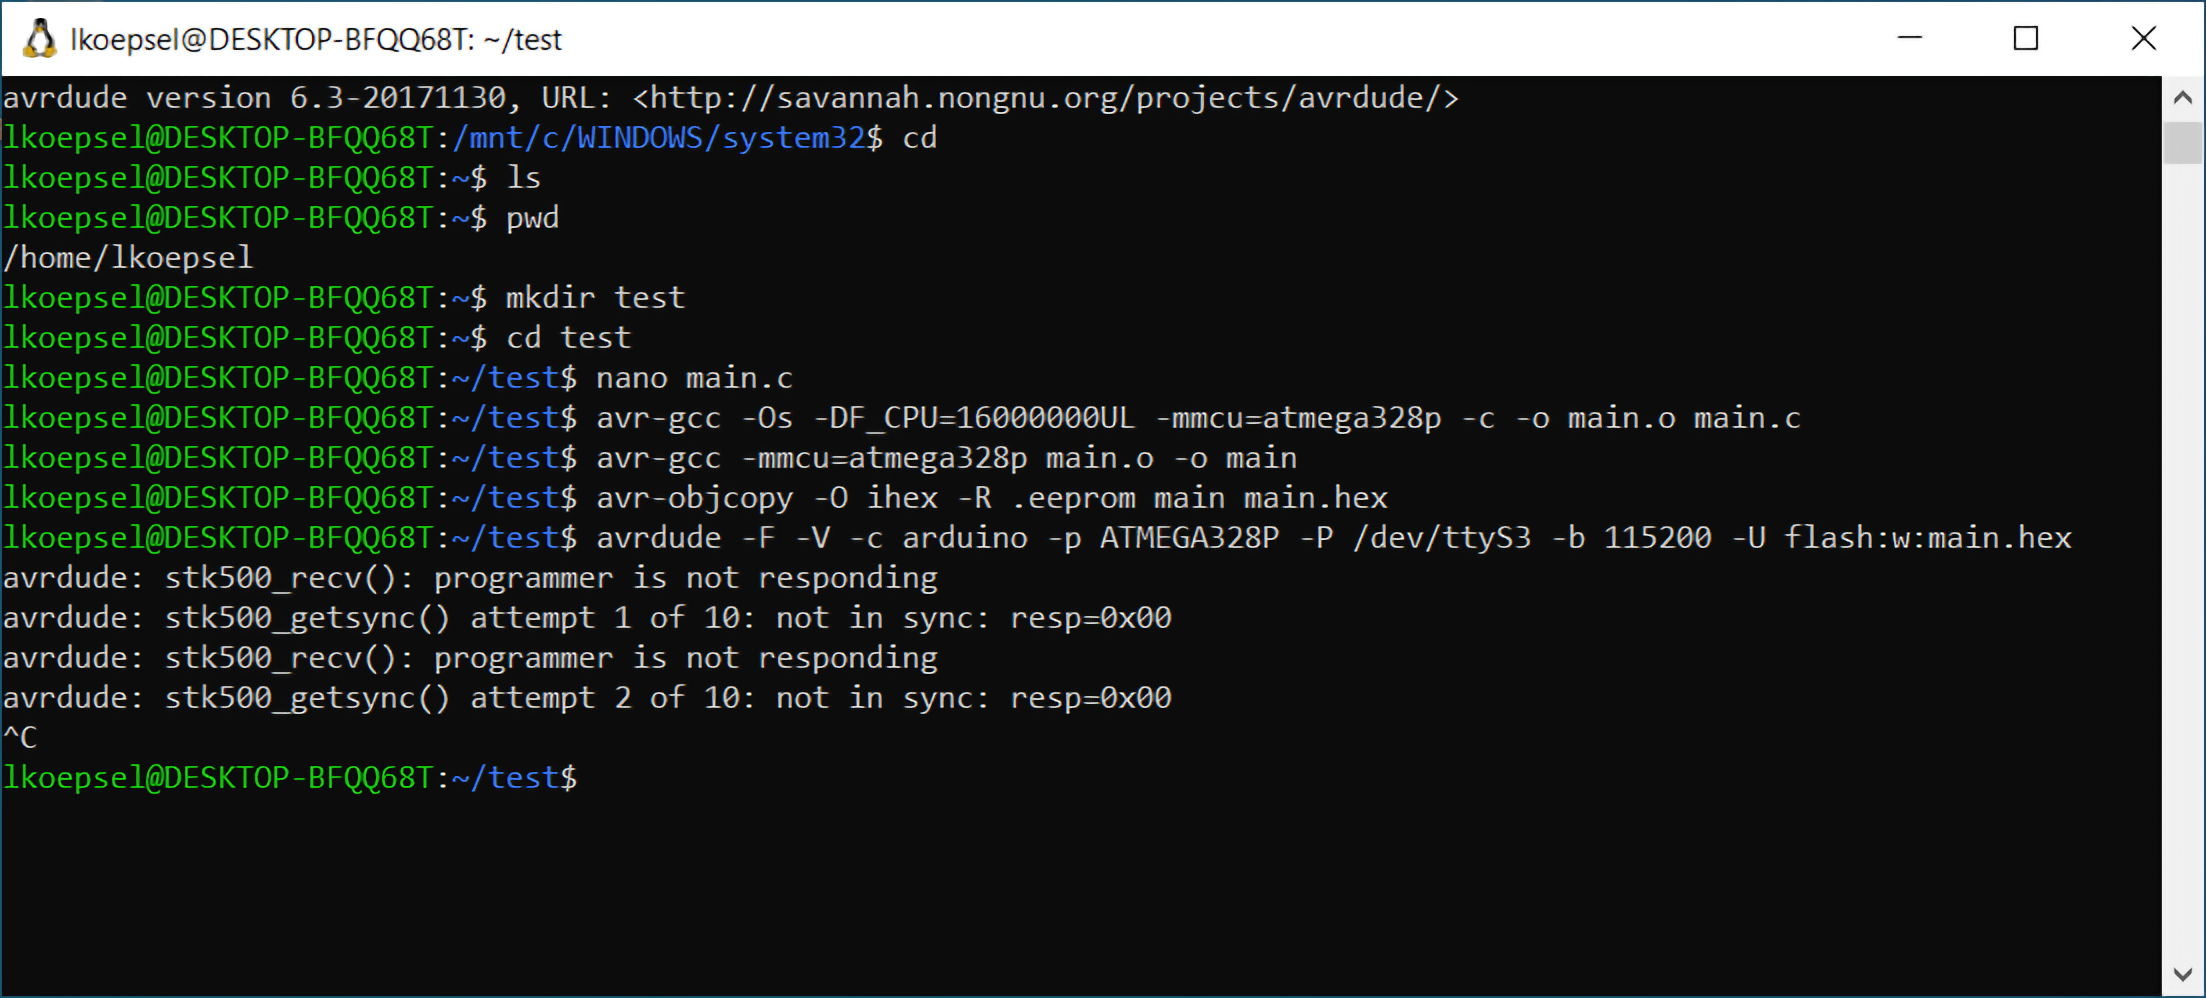
- Is the Arduino IDE installed, have you tested it, and it worked?
- Have you closed the Arduino IDE?
- Are you sure you are using the right port? Double check the number using the Arduino IDE and make sure the port name matches the port name on your averdude command. Ex: -P /dev/ttyACM0
Note: Two things:
- You need to perform the Arduino IDE step to get the port number.
When you run the averdude command above successfully, you will see the following:
main.c in the nano editor
Large Version to see detail AND your Uno will be blinking at a much faster rate!
If you see this instead:
main.c in the nano editor
- Is the Arduino IDE installed, have you tested it, and it worked?
- Have you opened the Arduino IDE and tested it since you last rebooted?
- Have you closed the Arduino IDE?
- Are you sure you are using the right port? Double check the number on the successful COM port matches the number on your averdude port. Ex: COM6 => /dev/ttyS6
Finish up#
Once you have tested the Makefile and the program main.c, the folder test is no longer required.
Linux Serial Permissions#
These steps are required for Linux.
- Run dmesg to determine idVendor and idProduct of the USB interfaces (in this case there are two.)
- Use sudo and your favorite editor to create a file: “/etc/udev/rules.d/50-myusb.rules”
- Using the idVendor and idProduct numbers, create two lines in the file using this format (replacing the numbers shown with your numbers):
SUBSYSTEMS==“usb”, ATTRS{idVendor}==“2e8a”, ATTRS{idProduct}==“0004”, GROUP=“plugdev”, MODE=“0660”, TAG+=“uaccess”
- Save and close the file then restart your system.
# use dmesg to determine idVendor and idProduct
# be sure to use the right USB devices (such as usb 1-1 and usb 1-2 below)
dmesg
# ...
[62603.487834] usb 1-1: New USB device found, idVendor=0403, idProduct=6001, bcdDevice= 6.00
...
[62603.492032] usb 1-1: FTDI USB Serial Device converter now attached to ttyUSB0
...
[62607.143187] usb 1-2: New USB device found, idVendor=2e8a, idProduct=0004, bcdDevice= 1.00
...
[62607.145394] cdc_acm 1-2:1.0: ttyACM0: USB ACM device
# ...
sudo nano /etc/udev/rules.d/50-myusb.rules
SUBSYSTEMS=="usb", ATTRS{idVendor}=="0403", ATTRS{idProduct}=="6001", GROUP="plugdev", MODE="0660", TAG+="uaccess"
SUBSYSTEMS=="usb", ATTRS{idVendor}=="2e8a", ATTRS{idProduct}=="0004", GROUP="plugdev", MODE="0660", TAG+="uaccess"
# save the file then reboot your system