Where I setup the Standard C toolchain (avr-gcc) for the ATmega328P on macOS using homebrew.
Test with the Arduino IDE!#
After performing these steps on multiple machines, I’ve found it best to install and test using the Arduino IDE before going forward with the installation instructions below. This will reduce the errors to something more manageable and having the Arduino IDE is handy for its Serial Monitor as well it provides an easy method to which port the Uno is connected.
1. macOS Setup and Tool Chain Installation#
For the macOS installation the installation will require using a package manager, in this case homebrew. If you don’t have it installed, you will need to do so before continuing. homebrew will require xcode command line tools to be installed as well.
Install the package manager, homebrew:#
# this command installs command line tools only, not all of xcode
xcode-select --install
# this command installs homebrew, a package manager for macOS
/bin/bash -c "$(curl -fsSL https://raw.githubusercontent.com/Homebrew/install/HEAD/install.sh)"
# get the latest versions list
brew update
sudo Request#
You might get a request: Checking for sudo access (which may request your password). This is required to setup the initial folder for installation. This github issue covers why:
“You’re correct that Homebrew does not need sudo when used. The installer however does so that it an create the necessary install directory /opt/homebrew and set up its permissions. The installer also uses sudo to install and setup the Xcode Command Line Tools if it is not installed. Once installed, Homebrew no longer requires sudo ever again.”
“If you can’t use sudo to install Homebrew, you still can install it without! Check here for alternative install instructions: https://docs.brew.sh/Installation#untar-anywhere. Note however that if you can’t install Homebrew to the default location (/opt/homebrew) due to permissions then you won’t be able to use some pre-built bottles and as such installing some formulae may build from source (which is a lot slower and more prone to errors).”
Install the tool chain#
I followed these instructions for installing the AVR tool chain. It took a fair amount of time to install, I had no issues throughout the process. To install the tool chain, you will need to perform:
# add the avr repository to homebrew, for information:
# https://github.com/osx-cross/homebrew-avr
brew tap osx-cross/avr
# avr-libc is now included in avr-gcc and use newer version of gcc
brew install avr-gcc@11
# follow the instructions from the above command to add avr-gcc to PATH
brew install avrdude
brew install make
brew install git
CHECK AND CONFIRM#
Once the installation completes, perform the following commands to confirm all applications were installed correctly. The application averdude provides a lot of output, only some is shown.
avr-gcc --version
make --version
git --version
avrdude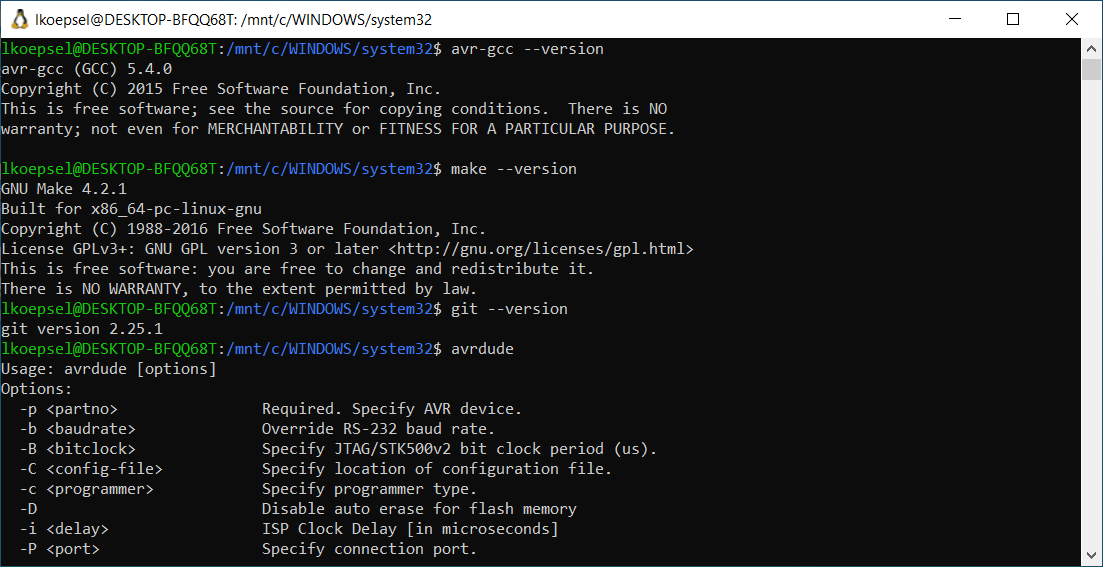
Check and Confirm the tool chain is installed
Now, we have the same capability as the Arduino IDE, however, we are able to use it via the command line!
2. Test the tool chain#
Test Code#
You will want to select the code in the box below, copy it then you will paste it into a code editor window. In the past, I’ve recommended nano, however, its a bit tough to use if you are new to the command line. The best code editor, I’ve used on the Mac, is Sublime Text 4.
#include <avr/io.h>
#include <util/delay.h>

#define BLINK_DELAY_MS 1000

int main (void)
{
 /* set pin 5 of PORTB for output*/
 DDRB |= _BV(DDB5);

 while(1) {
  /* set pin 5 high to turn led on */
  PORTB |= _BV(PORTB5);
  _delay_ms(BLINK_DELAY_MS);

  /* set pin 5 low to turn led off */
  PORTB &= ~_BV(PORTB5);
  _delay_ms(BLINK_DELAY_MS);
 }
}
Testing the Code#
In this step, we’ll setup a specific folder for developing C. I called it test. We’ll add a file called main.c, the we’ll compile/link the file on to the Uno.
cd
mkdir test
cd test
# copy the file from above and we'll call it main.c
# open main.c in your code editor
# paste the file, save it and exit
Notes on the steps#
- Using the command cd without folder descriptor, will take you to your home folder. Using cd test will take you to the new folder test you just created. Once you have saved the file, go back to the Terminal program and you will be back at the command prompt. Enter the commands below to compile/link your file.
# copy and paste each line separately
avr-gcc -Os -DF_CPU=16000000UL -mmcu=atmega328p -c -o main.o main.c
avr-gcc -mmcu=atmega328p main.o -o main
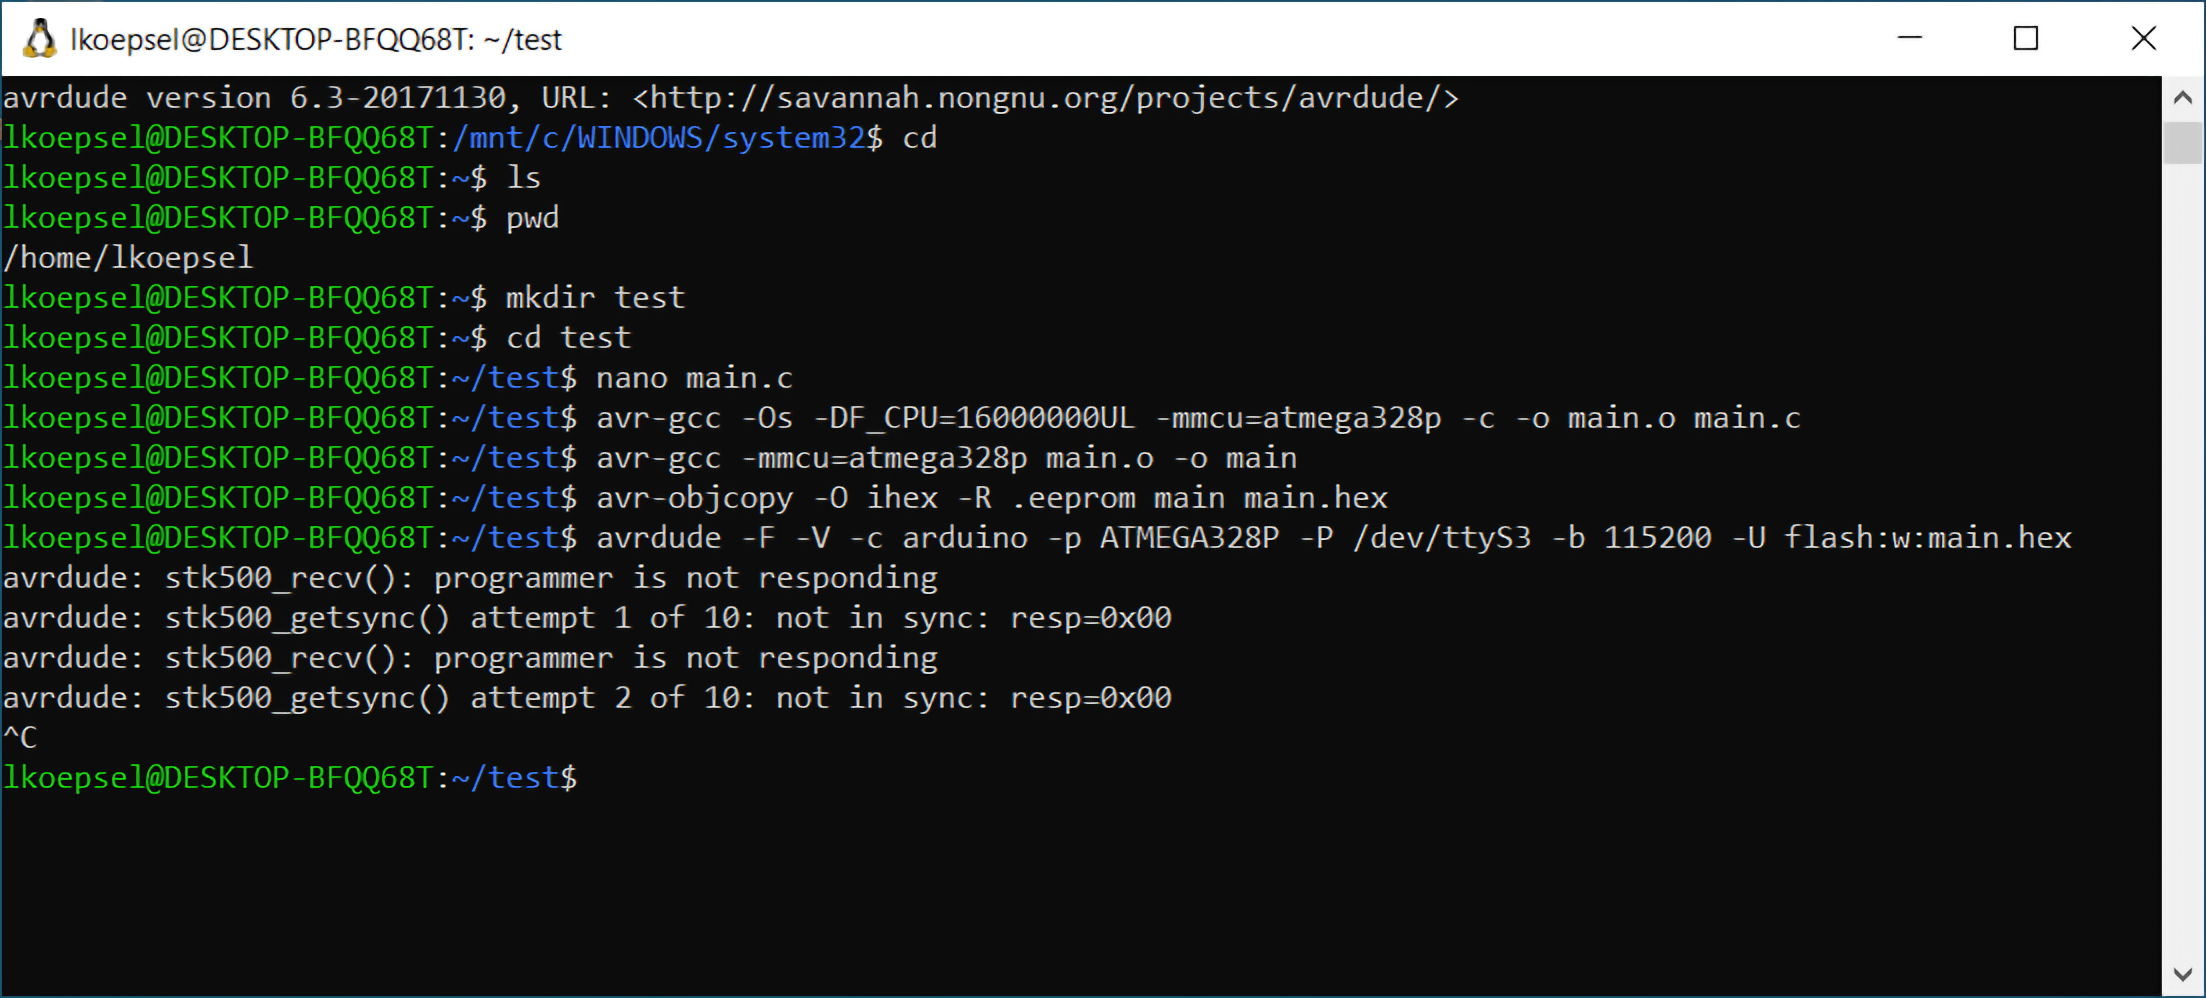
avr-objcopy -O ihex -R .eeprom main main.hexYour window will now look similar to this (both sets of operations shown:
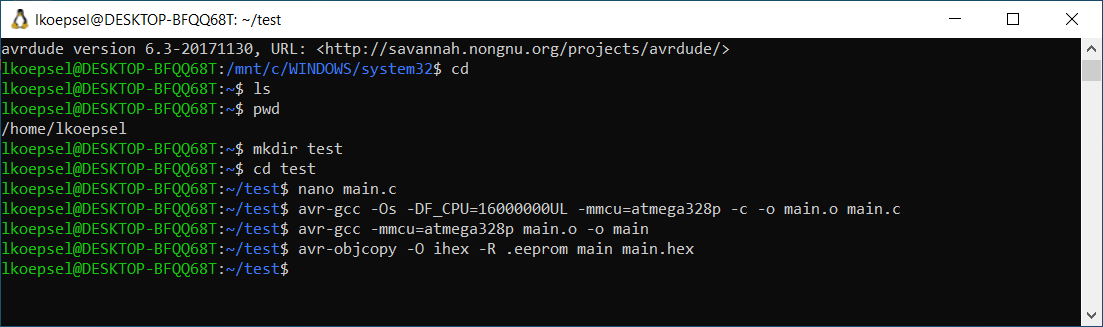
Performing compile/link/load in the command line
Our last step is to load the main.hex file on to the Uno. We use averdude to upload code to the Uno. We’ll use the following command:
avrdude -F -V -c arduino -p ATMEGA328P -P /dev/tty.usbserial-01D5C0C7 -b 115200 -U flash:w:main.hexNotice the "/dev/tty.usbserial-01D5C0C7"? You will want to change the “tty.usbserial-01D5C0C7” to the port name that you wrote down in the Arduino IDE port assignment in the earlier step Install the Arduino IDE.
When you run the averdude command above successfully, you will see the following:
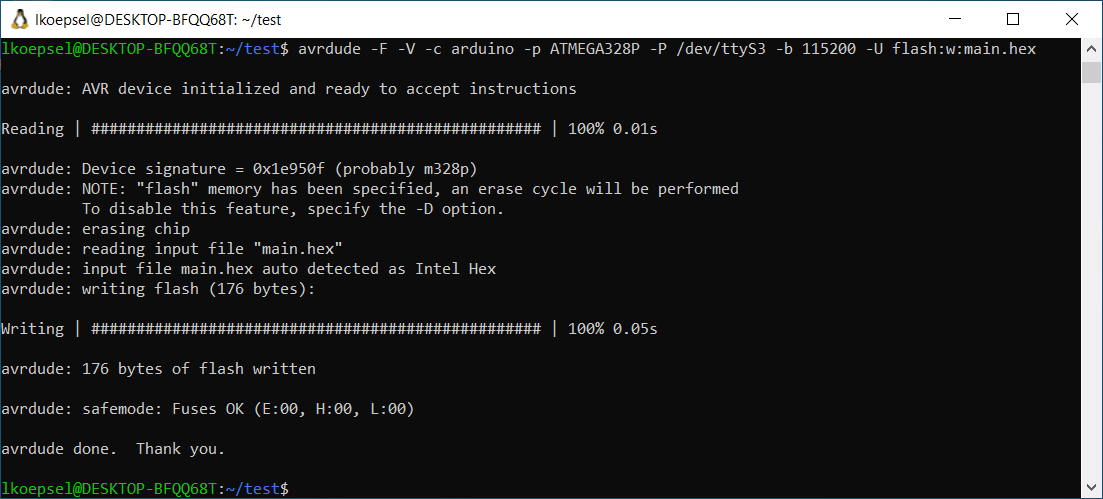
Successful averdude upload
Large Version to see detail AND your Uno will be blinking at a much faster rate!
If you see this instead:
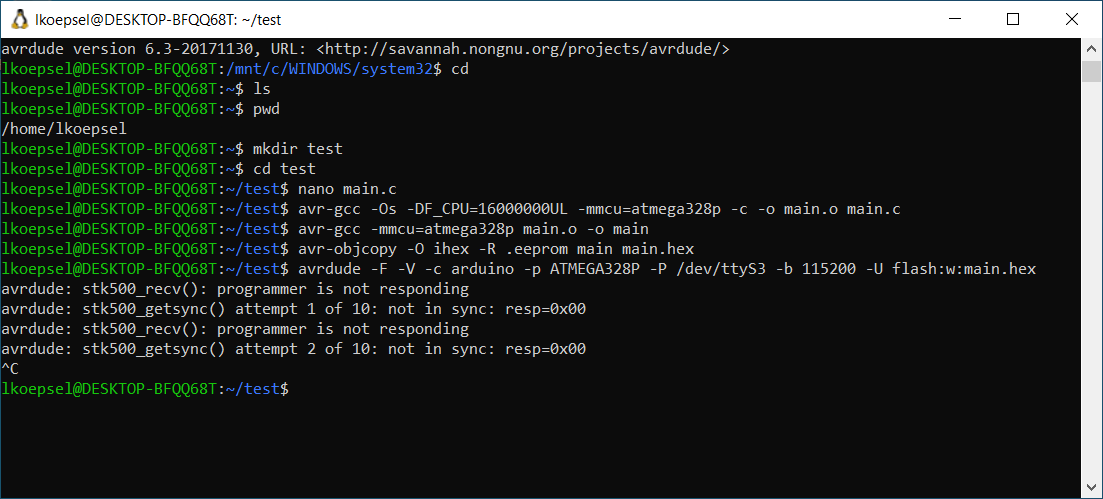
Typical averdude failure
- Is the Arduino IDE installed, have you tested it, and it worked?
- Have you closed the Arduino IDE?
- Are you sure you are using the right port? Double check the number using the Arduino IDE and make sure the port name matches the port name on your averdude command. Ex: -P /dev/ttyACM0
Finish up#
Once you have tested the Makefile and the program main.c, the folder test is no longer required.