Where I begin to develop a web server for the RP2040 (Pi Pico and Pi Pico W) using MicroPython and microdot.
Introduction#
The Pico W added wireless capability to the Pico, which brings the ability to network the Pico board. Once a board can be networked, it becomes valuable to have it serve web pages. An HTTP-compliant web page is a simple first step to using the Pico W via a network.
Links#
- microdot on GitHub
- microdot documentation
- Raspberry Pi Pico Python SDK
- Connecting to the Internet with Raspberry Pi Pico W
- GitHub repository for this entry
Web Server#
It is far better to use someone’s web server framework, than to develop a server on your own. This accelerates your ability to create a usable product and provides a powerful base on which to build. I went with microdot, written by Miguel Grinberg, an accomplished software engineer and educator.
To make styling easy to use and kind of lightweight, I used a CSS-reset/normalize framework, marx. It worked for me, it is light (10kb) and is simple. I was able to accomplish what I needed with a nice look. Update: Moved to mvp.css as it provides a better minimum viable product experience at a smaller size.
All of the code for this entry is on GitHub. I recommend cloning the repository to your system, as the repository files are required to understand the rest of this entry.
Getting Started#
I’ll walk through the process, in creating multiple versions, so you can understand how to develop a web server.
Add minimal functionality#
Along with the application code, there is a minimal amount of functionality required to create a web-based Pico W application. At a minimum, you need:
- Wireless lan capability which allows you to connect to the Pico W using wireless
- Credentials file for authenticating to the wireless lan
- Web server software, this is similar to the Flask with Python
Wireless lan - wlan.py#
The program can be used stand-alone or as a function connect.py. When used as a function, you use from wlan import connect then use connect() to create the wireless connection.
It handles the necessary handshaking to connect with a wireless access point, authenticate and will provide the IP address required to connect to the web server. The documentation in the file, provides more details.
Credentials - secrets.py#
In order to authenticate the wireless connection, a file secrets.py must exist with the SSID and password for the desired wireless access point.
The file must look like this:
ssid = 'Demo'
password = 'mpc1234!'
You will have to create this program manually, as it is not tracked by git and doesn’t exist in the repository.
Web server - microdot.py#
As stated before, the microdot web server software works similar to Flask. In this case, microdot doesn’t have all the features and is much smaller in code size in order to run on the Pico W. And in order to serve pages, the microdot.py web server software must exist on the Pico W.
Add the Application#
example.py#
To test the concept, I begin with the example code from microdot. I pasted the following into a file called example.py and saved to the Pico W as main.py:
# example - simple program to demo Pico W-based web server
# 1. setup wireless lan
# 2. set up the webserver
# 3. allow the program to be called from the REPL
from microdot import Microdot
import sys


# 1. this code sets up the wlan
def web_server():
    if not (connect()):
        print(f"wireless connection failed")
        sys.exit()

    #2. this code sets up the webserver
    app = Microdot()

    @app.route('/')
    def index(request):
        return 'Hello, World!'

    app.run(port=5000, debug=True)


# 3. allows us to debug calling web_server manually (REPL)
if __name__ == '__main__':
    web_server()
Here is the list of manual commands to reformat the Pico W, and add the appropriate files:
mpremote littlefs_rp2 # this command will erase all of the files on the Pico!
mpremote fs cp wlan.py :
mpremote fs cp secrets.py :
mpremote fs cp microdot/microdot.py :
mpremote fs cp http/example.py :main.py
I press the reset button on the Pico W and in CoolTerm I see the following:
IP Address: 10.0.1.2
MAC Address: 28:cd:c1:08:a9:78
Channel: 11
SSID: Demo
TX Power: 31
Starting sync server on 0.0.0.0:5000...
GET / 200
GET /favicon.ico 404
I browse to http://10.0.1.2:5000 and success! “Hello, World!”
Or you do all that, you press the reset button and nothing happens.
Debugging#
Here are few recommendations as to what to do when “nothing happens”:
What files are on the Pico W?#
Use mpremote fs ls to confirm all four files are on the Pico W.
mpremote fs ls
ls :
         591 main.py
       46368 microdot.py
        2346 wlan.py
Looks like I’m missing secrets.py which means my wireless lan won’t connect.
Start the program manually#
To start the program manually, use either the mpremote command or CoolTerm (but not both). Enter mpremote into the CLI or go to CoolTerm. Press Ctrl-B to soft reset the board, you will then get the REPL prompt. Enter the lines highlighted 4-5 manually:
|
|
In this case, its clear I’m missing wlan.py.
Bad wlan login information#
|
|
The error LINK_BADAUTH means bad authentication or we don’t have the right password in our secrets.py file. There are other wireless errors described here.
Details for Determining IP address#
When the Pico W resets, it will attempt to connect to the SSID using the information in secrets.py. The built-in LED will blink slowly, while in progress. If a wireless connection is made, the LED will turn off and the program will print the following information: (If a connection can’t be made, review the debugging instructions in the README.)
IP Address: 10.0.1.10
MAC Address: 28:cd:c1:08:a9:7d
Channel: 1
SSID: Demo
TX Power: 31
Starting sync server on 0.0.0.0:5000...
It is also critical the device (phone or PC) which are using to connect with the Pico is on the same network as well. Be sure you are connected to the same SSID.
The address you enter in your browser is a combination of the addresses supplied above. Use the IP Address combined with the port number following the 0.0.0.0 as in :5000. Using the above data, you would need to go to this address:
http://10.0.1.10:5000
Why Templates and not Javascript?#
Finally, a quick comment as to why not be more responsive and use javascript or vue or angular? Using javascript etc, is a client-side approach, which is preferable when you want to offer a fast response to the user. However, it can also cause problems where the responsiveness of the webpage is too fast for the Pico W and it may become unstable or in an unknown state. I would rather have the Pico Win complete control of what appears (which means server-side) and this ensures there is a greater chance for stability.
I have spent more time on this project and now incorporate websockets using Javascript for some of the examples. I provide more details on this here.
Versions#
The microserver program has seven versions, to show iterations of improvement. The README has the details as to how to load each version. The README has quite a bit of detail as to how to work with the Pico W, I recommend reading it along with this entry.
If you haven’t already, you will want to clone this repository to your system to test and understand the examples. To review how to clone a repository and make it yours.
Version 1#
This version will light the built-in LED. It is very simple and the objective is to understand how the HTTP to hardware interface works. The goal with this version is to just understand how to translate a web-based action to a hardware action, a proof-of-concept.
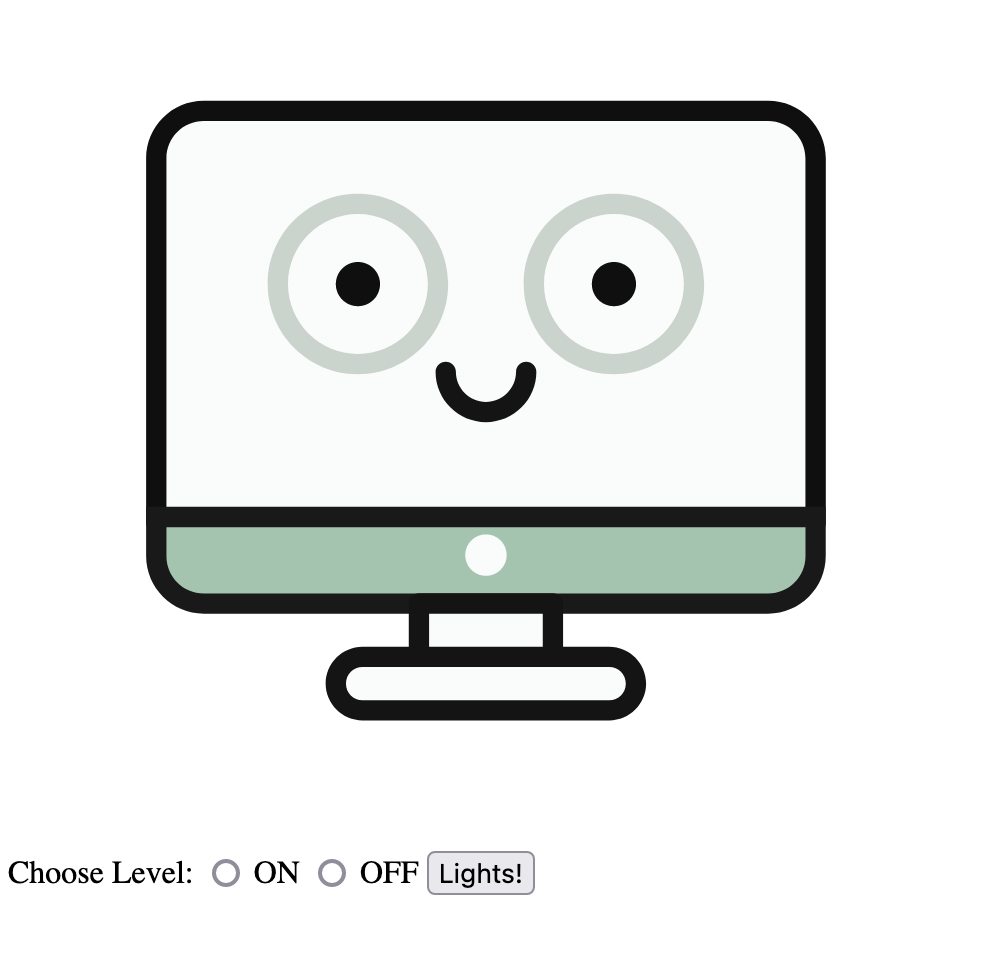
Microserver Version 1 webpage
Lines 7-14#
This code was described here and determines if running on a Pico, if so, it attempts to make a wireless connection. When it does, it provides the information described above. It will be in all web-based programs and won’t be mentioned again.
# Required for WLAN on Pico W, 'machine' indicates Pico-based micropython
# Will not differeniate between Pico and Pico W!
if hasattr(sys.implementation, '_machine'):
    from wlan import connect
    if not (connect()):
        print(f"wireless connection failed")
        sys.exit()
Line 15#
Setup built-in LED to be an Output and name it builtin.
builtin = Pin("LED", Pin.OUT)
Lines 17-23#
Very similar to the microdot example, this code starts the webserver and provides the initial webpage. I have created a folder called templates as we will want to serve pages from this folder in the future.
app = Microdot()

@app.route('/')
def index(request):
    return send_file('templates/index.html')
Lines 25-32#
This is the critical work. It uses a HTTP POST method. This type of operation allows us to retrieve data from a web page. The easiest way to understand (and debug) this, is to open your browser and use the developer tools. [Use search to find out how to use Developer tools for your desired browser.]
With your developer tool, you can see the data which is sent on each button click. For example, FireFox Browser Developer Edition will show the following:
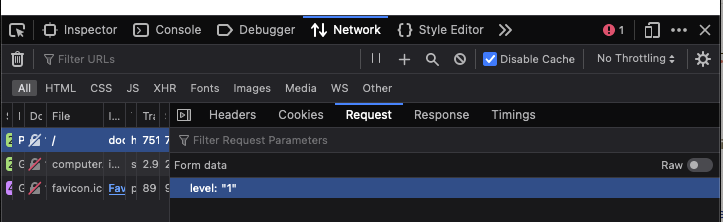
FireFox Post Request
This is what the browser will show immediately following a click on “ON” and click on “Lights!”. It has two parts, the word level: and the value “1”. If we were to click on “OFF”, we would see the value “0”. This means, we’re able to turn the LED on (level = 1) and off, (level = 0). We do that by the code below:
- First we get the value of level and convert it to an integer.
- We then use it to set the value for the builtin LED.
@app.post('/')
def index_post(request):
    level = int(request.form['level'])
    builtin.value(level)
    return send_file('templates/index.html')
Lines 34-40#
This code will need to be duplicated for every file which needs to be served. For example, when we add a CSS style file, we will have a similar section of code or if you wish to offer an ICO (web icon file). The code simply provides a route to the webserver as to what to send when the route is requested by the browser.
The last line will start the webserver. If you wish to change the port number from 5000, you may add port=5001 as in app.run(port=5001, debug=True)
@app.get('computer.svg')
def computer_svg(request):
    return send_file('./computer.svg',
                     content_type='image/svg+xml', max_age=31536000)

app.run(debug=True)Issues#
The immediate issue seen with this example, is that the radio buttons don’t reflect the state of the LED. You are able to choose which state you wish (on or off), however, without looking at the LED, you don’t know what the state needs to be.
Another issue, is that this is a limited example. It only deals with the builtin LED.
Version 2#
This version solves the second issue with Version 1. It provides you with the ability to set a specific pin as compared to the builtin LED. I see this as a minimum-viable-product (MVP).
Lines 7-21#
I added a yellow, green, red, and blue led to pins GP2, GP15, GP16 and GP22, respectively. The code to enable them and provide the ability to turn them on/off is this:
yellow = Pin(2, Pin.OUT)
green = Pin(15, Pin.OUT)
red = Pin(16, Pin.OUT)
blue = Pin(22, Pin.OUT)

def set_led(color, level):
    if color == 'RED':
        red.value(int(level))
    if color == 'GREEN':
        green.value(int(level))
    if color == 'BLUE':
        blue.value(int(level))
    if color == 'YELLOW':
        yellow.value(int(level))
Lines 41-47#
With four LEDs instead of one, I added another value to the form called led. It provides a color upon selection based on the color of the led desired. I use similar code to get the values, however, I do the integer conversion in the led function instead of on getting the value.
@app.post('/')
def index_post(request):
    level = request.form['level']
    led = request.form['led']
    print("Set", led, "led", level)
    set_led(led, level)
    return send_file('templates/index.html')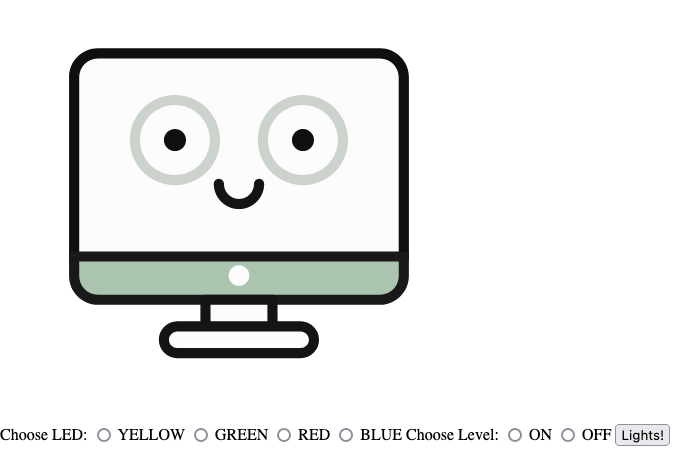
Microserver Version 2 webpage
It works, however, from a user experience (UX) perspective, it needs work. Your inclination is to select multiple LEDs and having to click and additional button for on or off seems tedious. It would be nice to check a box, if you want the LED on or uncheck for off for all of the LEDs at once. Being able to check or uncheck a box, which also reflects state, would be a better UX as well.
Version 3#
Along with the UX concern voiced above, the long line of text is also a bit of a problem as well as the serif font. To fix the latter problem, we had a file which cleans up our CSS a bit called marx. It provides a nice CSS palatte for our web page. Notice we had to add a section of code to serve the file as well. (Lines 66-69) And we added the file to the templates folder in the Pico.
We also added a folder of code called utemplate. This code provides the capability of templating. Templating is the ability to use placeholders in your code and change the value of the placeholder, programmatically.
We use this concept to replace the radio buttons on the previous two versions with checkboxes. A checkbox will appear checked if the word “checked” follows it, in the HTML. We use an arra called led_state to track that for the four leds, so now when the led is on, the checkbox will be checked. If off, checked will be a "" or null string.
The code is a bit cumbersome as the POST operation only returns which boxes are checked. And if no boxes are checked, its important to set all of the values in led_state to ‘’.
def set_led(leds):
    global led_state
    print(f"{leds}")
    if len(leds) == 0:
        yellow.value(0)
        green.value(0)
        red.value(0)
        blue.value(0)
        led_state = ['' for _ in range(4)]
    else:
        for led in leds:
            if 'YELLOW' in leds:
                yellow.value(1)
                led_state[0] = 'checked'
            else:
                yellow.value(0)
                led_state[0] = ''
            if 'GREEN' in leds:
                green.value(1)
                led_state[1] = 'checked'
            else:
                green.value(0)
                led_state[1] = ''
            if 'RED' in leds:
                red.value(1)
                led_state[2] = 'checked'
            else:
                red.value(0)
                led_state[2] = ''
            if 'BLUE' in leds:
                blue.value(1)
                led_state[3] = 'checked'
            else:
                blue.value(0)
                led_state[3] = ''
This version is is “shippable”. If you had someone have to use this interface, it would work well. It does the following:
- shows the state of the LED
- allows one to change the state of any of the four, with one click
This version isn’t self-documenting, meaning, you are unaware of which pins will be controlled. This can be a problem, in that if an LED doesn’t light, is it due to software or hardware?
Version 4#
To solve the documentation issue from Version 3, I add details as to the pins being used and the colors of each led attached to a pin. This required an include file as part of the template package. I pass a two-dimensional list (array) to the template than use the variables to provide the color and pin number.
I found this version to be more cumbersome than useful, so I went on to version 5. Keeping both the setup and execution on the same page, wasn’t ideal. It would be better to have setup as the first page, then a second page would control the led state. It would be nice to also change the labels for each pin along with the pin number.
Version 5#
This becomes the basis of my final version. I use a capability of the POST function to switch pages. The first page is the typical index.html, where I provide the capability for the user to set the label text and pin number (Pico W pin, not GPIO number). When the POST operation happens, it calls the second page called control.html, as it controls the LEDs. When this page loads, it uses a set of lists to determine the following:
- label - the name attached to the pin
- pin - the Pico W pin number (0-40)
- gpio - the gpio corresponding to the pin number (0-22)
- state - whether or not, the check box is checked
A nice feature of this version going forward, is that the LED colors could be labeled as in Warning, Success, Error, and Informational as compared to Yellow, Green, Red, and Blue, respectively.
Version 6#
While I was happy with the capability of version 5, I found the code was becoming cumbersome. I also found a new css template which was more representative what I wanted. To resolve the first issue, I changed the four lists with a common index to a class. This provided a stronger basis of self-documentation and the code would scale more easily. Using a class helped to simplify the code, however the code control_led() still seems a bit clunky, due to the HTML POST operation.
I saw another minimum css file called mvp.css. In the case of mvp.css, it was described specifically to provide the basis of a minimum-viable-product type website. Which is precisely what I have with this site. It is a bit more opinionated, however, seems easier to adjust than marx.css.
From a UX-perspective, it’s improving greatly. The vertical layout is better for phones and small devices. The new css file provides a cleaner and better looking interface. We’re almost there!
Version 7#
Now that I have a very good working application, the next step is to refine and refactor. I refactored the code in several areas:
- webserver_v7 - now uses a POST array to handle the multiple values for labels, pins etc. This allows me to use a loop for assigning the values, a far cleaner approach and will scale nicely.
- control_v7 - follows a similar approach and uses the leds list to provide a looping approach to the code as well.
- default_pins_v7 - reduces the pin list to 1 from 4, reducing code size and complexity in making changes.
The refactoring reduced the code size of the affected files by approximately 30%:
| File | Version 6 (bytes) | Version 7 (bytes) |
|---|---|---|
| main.py | 4,235 | 3,478 |
| pins.py | 0 | 1,276 |
| control.html | 2,277 | 1,403 |
| default_pins.tpl | 0 | 1,055 |
| index.html | 4,974 | 707 |
| Total size | 11,486 | 7,919 |
Continuation#
In part two, I’ll review a similar approach, however using web sockets.