Where I describe the process of developing code for the Arduino Uno(AVR ATmega328P), specifically, uploading code to the Uno.
Introduction (from Edit)#
The middle three steps compile/link/locate are typically called the build process, which can simplify the five steps to three:
- Edit
- Build
- Upload
Upload#
Determine the port#
The most important step in uploading to the Uno is to ensure your env.make file is using the correct serial port. The easiest method for this is to plug-in your Uno and use the Arduino IDE and Tools -> Port to identify the port used by the Uno. Here is a screenshot of this process on the Mac:
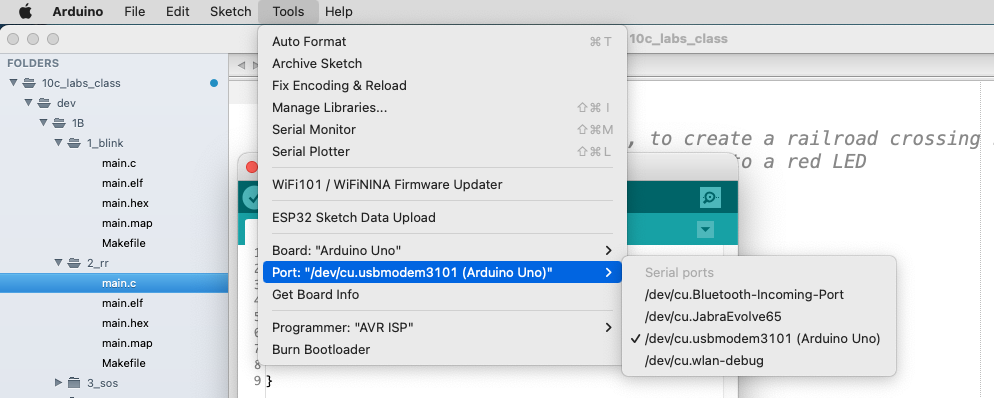
Using the Arduino IDE to determine the Uno port
Once this port has been identified, open the env.make program using your code editor and replace the text following “Serial = “, as in:
SERIAL = /dev/cu.usbmodem3101
Other ports might be:
- Linux: /dev/ttyACM, /dev/ttyUSB0
- Windows: COM3, COM4
- macOS: /dev/cu.usbmodem43248
Uploading#
The easiest command to upload is “make flash”, this command will perform all of the operations required to upload a file to the Uno. The process is:
- Does main.elf exist? (This is the executable binary file in the right format.)
- Has main.c changed or any of the Library files?
- If “yes” to 1 and “no” to 2, then run avrdude
This video will help you resolve, if errors occur:
https://youtu.be/yqzuKu-IPNY