Where I describe the process of developing code for the Arduino Uno(AVR ATmega328P), specifically, editing the code.
Keyboard Commands Cheatsheet (in all applications)#
| Description | Windows Keys | macOS Keys |
|---|---|---|
| Copy selection | Ctrl - c | Cmd - c |
| Paste clipboard | Ctrl - v | Cmd - v |
| Select all | Ctrl - a | Cmd - a |
VS Code Keyboard Commands Cheatsheet#
| Description | Windows Keys | macOS Keys |
|---|---|---|
| Tool Palette | Ctrl-Shift-p | Cmd-Shift-p |
| Build Task | Ctrl-Shift-b | Cmd-Shift-b |
Terminal Commands Cheatsheet#
| Description | Command/key | Comments |
|---|---|---|
| Change directories | cd | Use to change folders |
| Expand current text to a folder name | Tab | Type first few letters then hit Tab |
| Present working directory | pwd | What folder are you in? |
| List contents of directory | ls | Show what is in the folder |
| List folder in tree format | tree | Show what is in the folder |
| Previous command | Up arrow | display previous command |
| Open serial monitor | tio [ acm | usb ] | Pick one of the two options based on your controller board serial port |
Setup Raspberry Pi Development Screen#
This is a a very simple configuration. The left-half of your window is VS Code and the right half of your window is your CLI (terminal application.) Use tabs on both to view multiple files or instances.
The other two systems, macOS and Windows are at the bottom of this page.
The Arduino IDE#
We use the Arduino Uno as the hardware platform for developing C programs on embedded microcontrollers. The Uno is a phenomenal tool for this in that it is easily available, relatively inexpensive, and there is tremendous amount of information available on it and the microcontroller it uses, the AVR ATmega328P.
That said, we specifically do NOT use the Arduino IDE. Why is that? We don’t for the following reasons:
- It uses C++ and we want to specifically use only the C language
- Its code editor is light-weight and specific to the Arduino
- It hides the process of building programs
I do advise installing the IDE as it is a time-tested method of confirming you have a known, good connection between your Uno and your PC. It is typically easier to debug the serial connection using the IDE than using the command line tools. And, it can also be used as “check” to confirm, “yes, my board is working”".
And in fairness, you are able to specify external editor’s and you can specify “verbose” in the build process, however, the top issue remains. And I want to help you understand software development, and using the IDE, won’t do that well.
The Five Steps#
There are five specific steps which the IDE enables and any one must take, in order to develop software for the Uno:
- Editing the code
- Compiling the code
- Linking the code
- Locating (sometimes referred to as loading)
- Uploading the code to the Uno
The middle three steps compile/link/locate are typically called the build process, which can simplify the five steps to three:
- Edit
- Build
- Upload
I find it best to keep the three steps separate, as it is in these three steps, where most errors occur. For a detailed and very worthwhile description of the middle steps, I highly recommend this page, Compiling, Link and Locating: Barr Group.
Possible code editors:#
- All: VS Code - free, due to its strong remote approach, this is the one I recommend for the Pi Dev Platform
- All: Sublime Text 4 - $99, nagware (will ask for payment, however you can still use), still the best pure code editor
- Windows: Notepad++ - free, and very good for Windows
- All: Vim - steep learning curve, very powerful
- macOS: zed I’m hopeful that zed continues to evolve, as we need a robust community of code editors. Remains, too experimental for now, however, it is looking very good. And it has remote support, which is required for the Raspberry Pi.
Setup Screen: Simple Explanation#
Here is an image of how I do it.
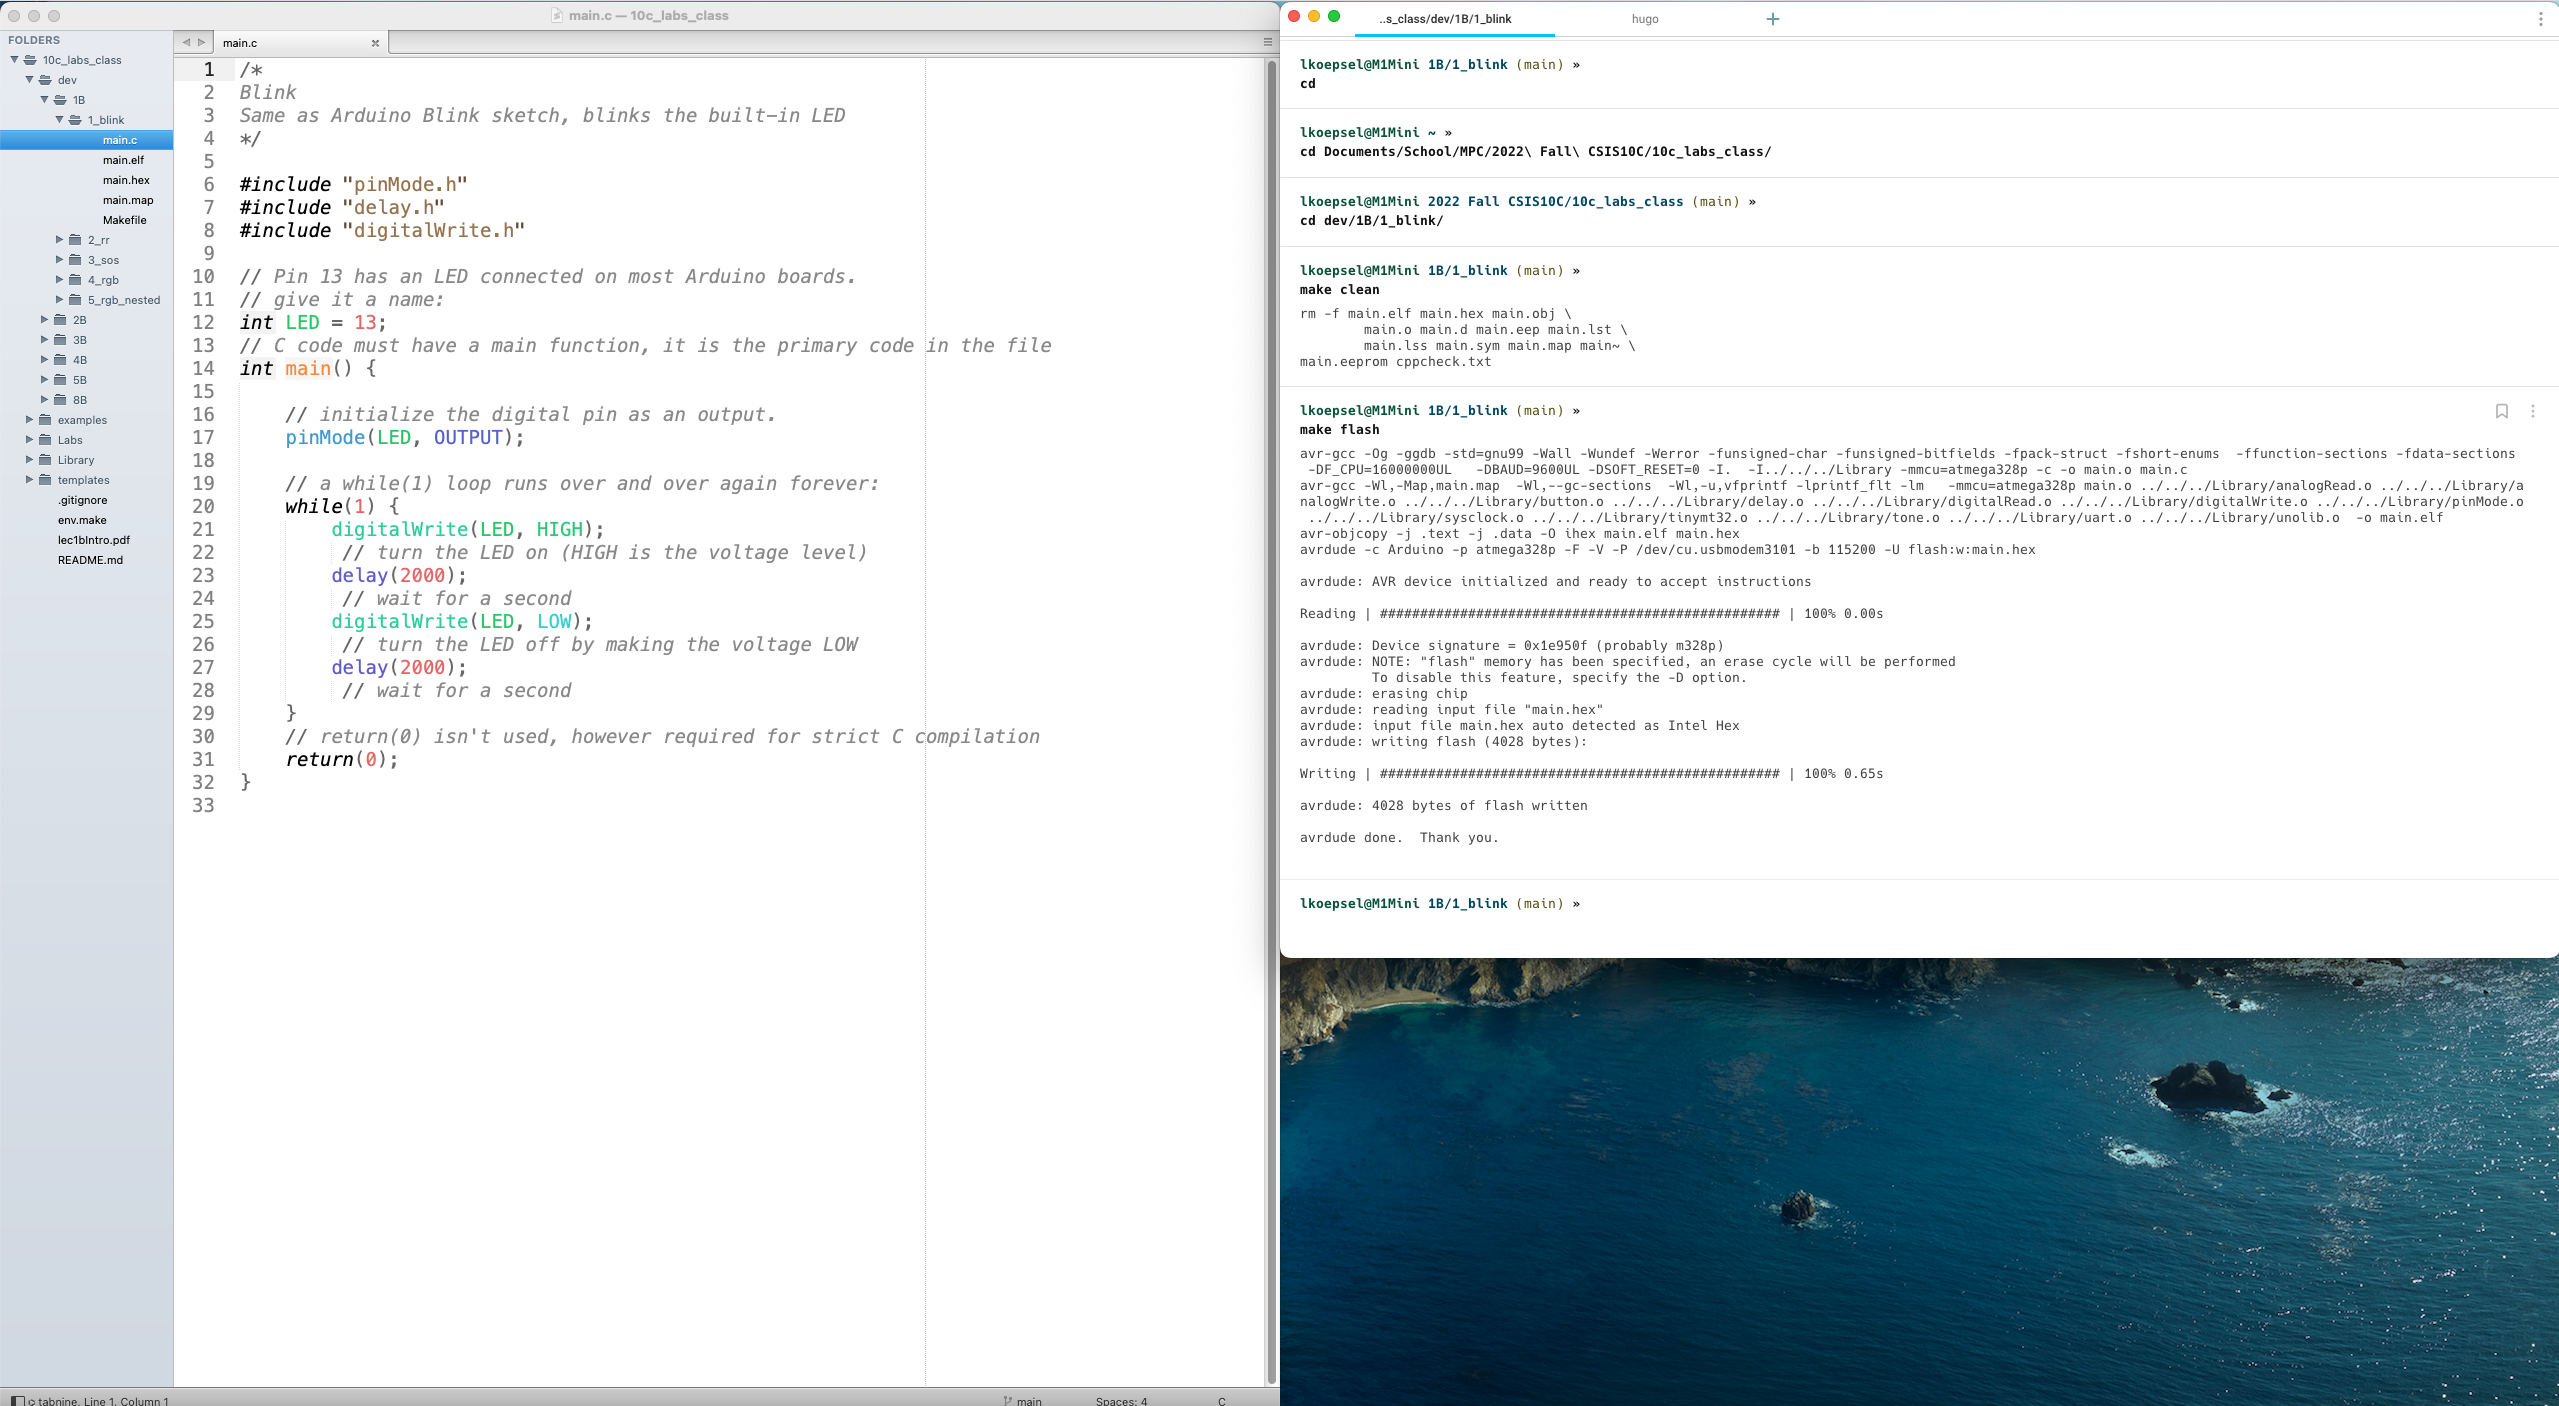
Screen Setup for Using C tool Chain
I setup my code editor (in this case, Sublime Text 4 (ST4)) in a full length window, covering the left half of the screen. In the upper right hand quarter of the screen, I setup my terminal window (in this example, I’m using Warp). In the image I made the window slightly longer to show all the commands I use for setup.
Commands in Terminal#
# make sure I'm in my home folder
cd
# go to my main folder for this project
cd Documents/School/MPC/2022\ Fall\ CSIS10C/10c_labs_class/
# at this point, I typically open ST4 using "st ."
# in this example, I move to the folder where I'll be compiling code
cd dev/1B/1_blink/
# I want to start with a clean set of code, source and Makefile only
make clean
# I have connected my Uno to my computer, time to compile and upload
make flash
In depth: Editing#
A very good code editor can help prevent errors in the remaining steps of the process, by syntactically highlighting the code. For example, in the screen shot below, you can see that “digitalWrit” is in a different color on line 14 vs. line 16. Both lines need to be quite similar and the color difference indicates I’m referencing a different function. [Note: The function digitalWrit doesn’t exist and will cause an error when I attempt to link the code in step 3.]
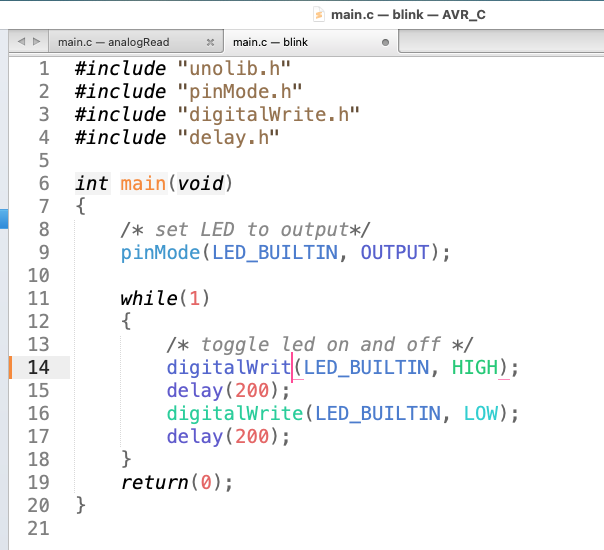
Wrong function name, digitalWrit
An even better code editor will provide the probable function name which I’m attempting to use, as Sublime Text does with the tabnine plug-in. See image. At this point, I hit return and it fills in the proper function.
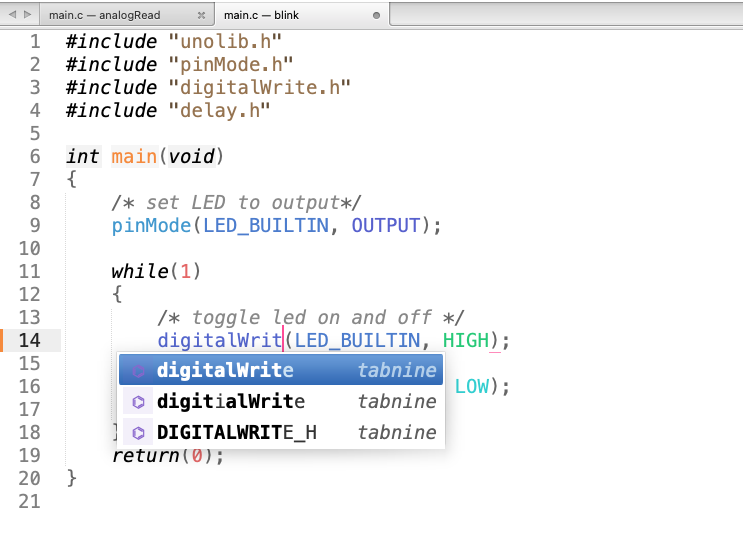
Suggested function name, digitalWrite
I use Sublime Text 4 (ST4) as I like it, its fast, and it has a large number of plug-ins to enhance its behavior. I’ve also used it for over 10 years, so I’m comfortable in it. I use it to edit Python, Forth, C, Julia, and markdown text (as in this website).
The last point is the most important point, as a software developer, I need a tool which I am able to use on different languages and in different situations. Its valuable to me to use the same tool for editing this website, for developing Python scripts to image recognition and for developing code for embedded systems. I am also able to use ST4 on all three platforms, Linux, macOS and Windows.
I don’t use nor advocate using an IDE such as Visual Studio or Visual Studio Code. I attempted to use VSC to develop for the Uno, several years ago, however, I spent more time configuring it than made it worthwhile to use. MicroChip also has an IDE for the AVR series of microcontrollers and I only use it to reprogram the ATmega328P (using the IPE, not the IDE).
One last note on ST4, yes, it costs $99. That said, I’m in it 20-30 hours per week, 52 weeks a year (for a 3 year subscription). So yeah, I’ll say its worth it.
To finish on editing, I always have my editor window open while I’m developing code. It covers the left half of the screen, while my terminal program covers the top right quarter of the screen and a serial program covers the bottom right quarter. This covers 95% of my development needs.
In this specific case, I’m working on the analogRead function, so I’m cycling between the code editor (left-side), terminal window (top-right) and serial monitor (bottom-right). This is a fairly simple example of a dev environment and it works for me, I highly recommend you begin determining a setup which works for you.
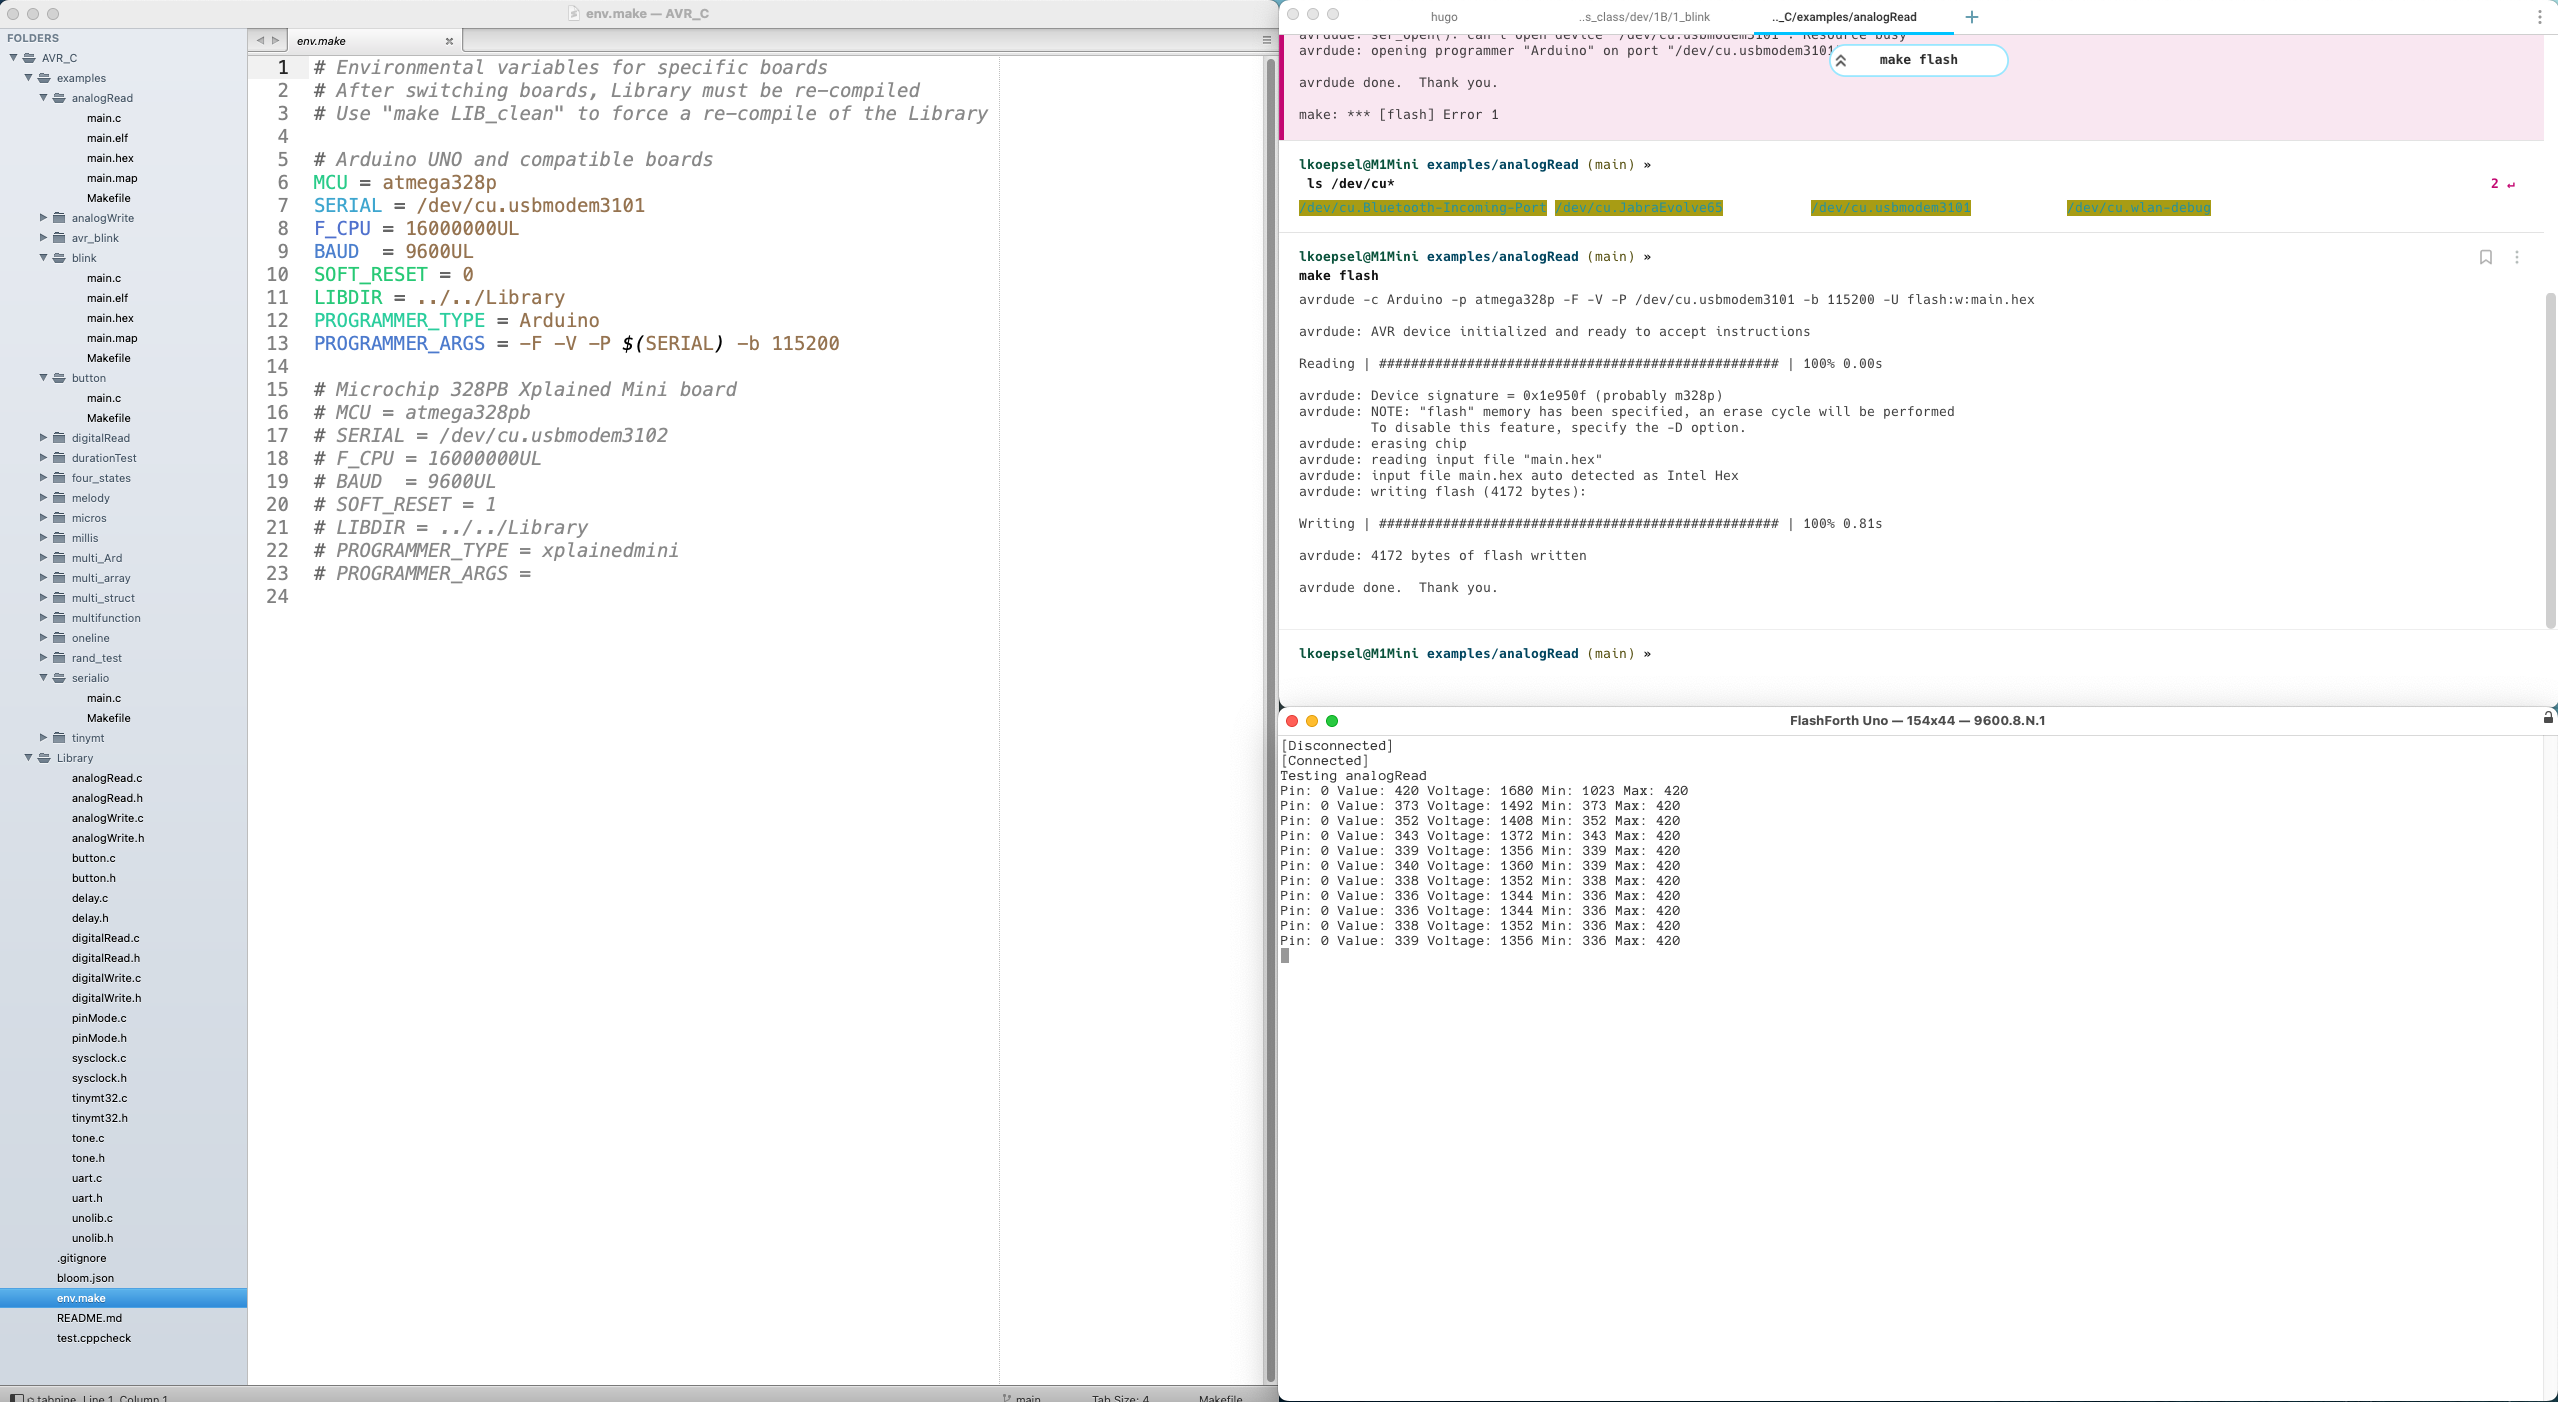
Typical development environment
Setup Your Screen#
It’s important to setup your screen properly for working with the C tool chain. The three programs you will use the most are your code editor, terminal applications and a serial monitor. In these videos, I will show how I setup the three applications. Its also advisable to have your browser open and available as well.
Be sure to check out Wait There’s More! below, as it can save you a considerable amount of time in development by automating the complete cycle of disconnecting from your serial interface, uploading a program and reconnecting and activating the serial interface.
macOS: Screen Setup#
The macOS video also has an interesting compile error which I detail here
Windows: Screen Setup#
Wait There’s More!#
For macOS and Windows users, CoolTerm has a scripting interface which provides the opportunity to automate disconnecting and reconnecting. An great example is provided in this repository.
Following the instructions on this repository, will provide you with the ability to automatically disconnect, upload a file then reconnect and activate CoolTerm using Sublime Text. A great timesaver when programming an Uno in C!