Where I describe the function - digitalWrite().
Introduction#
The digitalWrite() function is a basic building block of using a microcontroller. The function will either raise the value of an output pin to 5V or it will lower it to GND (0V), and in doing so will provide current to drive an LED, a motor or any device which requires current.
The Arduino Reference: Digital Pins also has a good description as to how pins and pinMode() works.
Background#
Let’s start with a simple electric circuit, the images below are a schematic on the left and a physical diagram on the right. The former is valuable for circuit analysis and the latter, provides an illustration for us to follow in order to build the circuit.
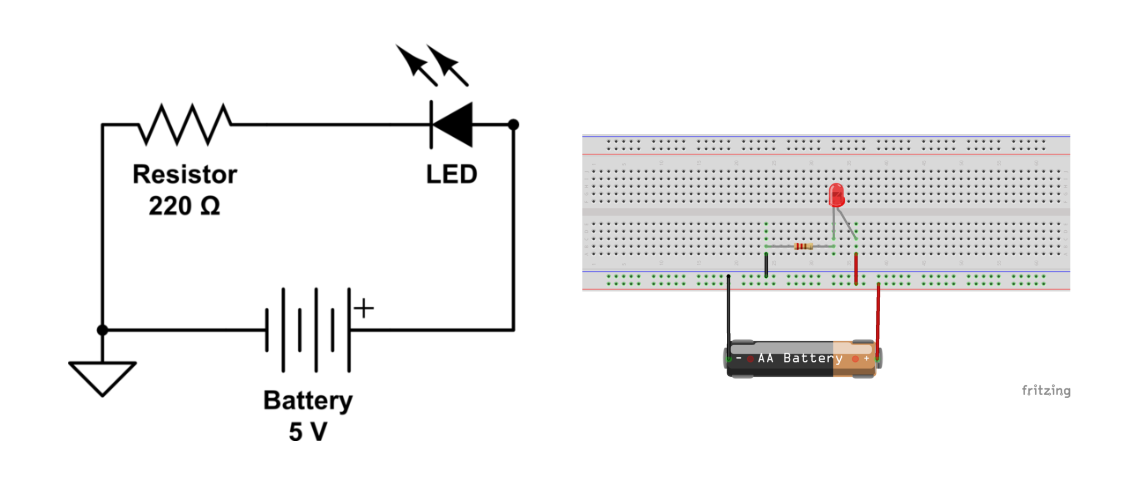
Simple LED Circuit
In this circuit, a battery (in the image, a 1.5V AA battery) provides a voltage across both the resistor and the LED. Current flows from the positive end of the battery, through the LED, through the resistor then back to the battery. This will make the LED light. The schematic on the left, has a “5V battery” to imitate our next step, where we replace the battery with the pin of an Arduino Uno.
Replace Battery with Uno#
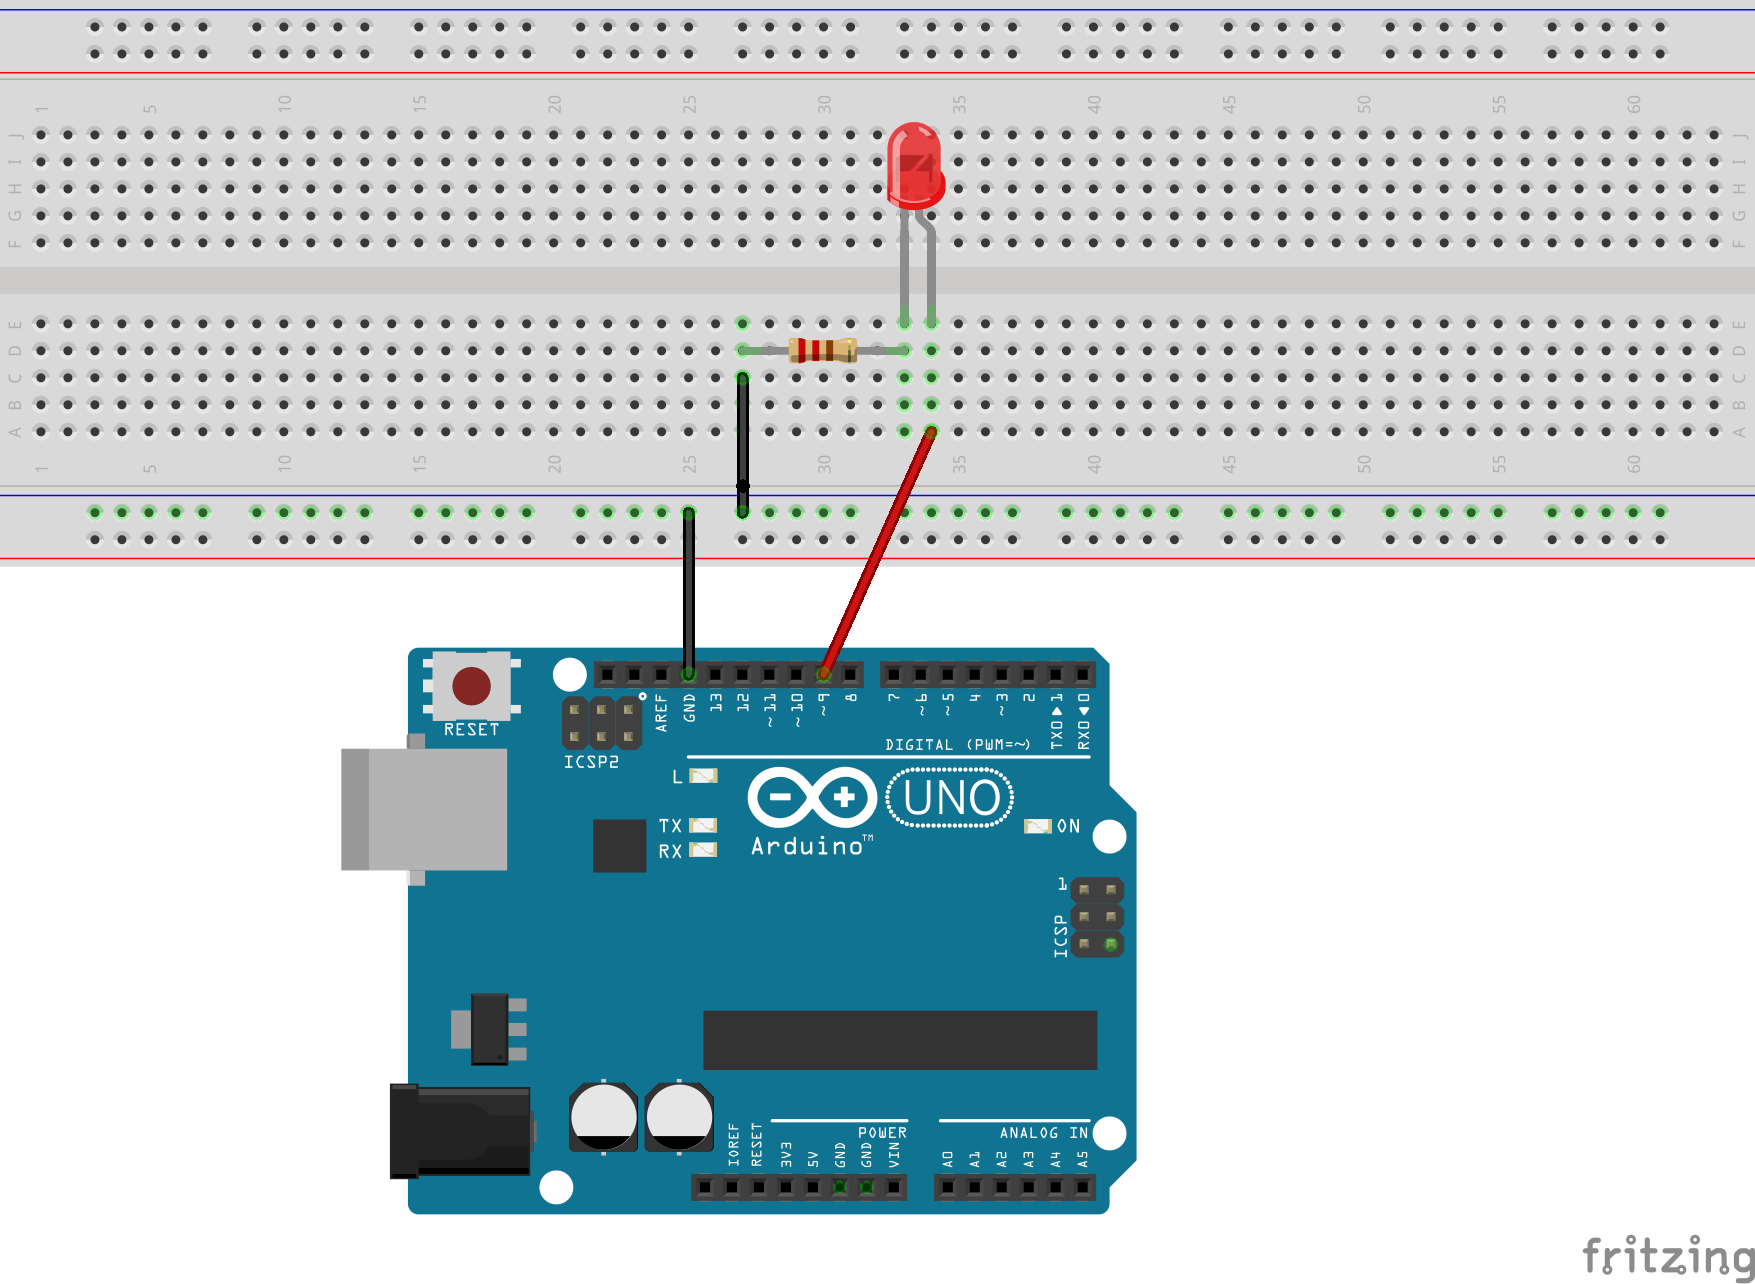
Uno LED Circuit
We’re just showing the image now, as the schematic would be identical when Pin 9 is HIGH. When Pin 9 is LOW, think of the battery being removed from the schematic (or a wire from the battery to the led, being removed).
The behavior above describes using digitalWrite(9, HIGH) and digitalWrite(9, LOW). The beauty of this circuit versus the one with the battery, is that we can write programs to make the LED blink, turn on, or turn off when something happens.
Set the Pin as an Output#
We do need to do one thing, prior to using digitalWrite(), which is to use the function pinMode() to make the pin an OUTPUT, as in pinMode(9, OUTPUT). The ATmega328P, the microcontroller on the Uno, only has 28 pins, however, it is able to provide: (at a minimum)
- 23 Input pins
- 23 Output pins
- 6 10-bit analog-digital pins
- 2 pin serial interface (I2C)
- 4 pin serial USART
which equals 58 different pins! It is able to do this by making most of the pins, multifunction and it is the responsibility of the programmer to setup the pin properly before attempting to use it.
Pulling it All Together#
The blink program is a great example of using both pinMode() and digitalWrite(). In this simple example (simplified below), you can see:
|
|
Wait, there’s more!#
The Arduino digitalWrite() only allows for writing a HIGH or a LOW. There might be times, where you either don’t know the state and wish to flip it or you wish to simplify your code. For these situations, you would like to have a TOGGLE, or I shortened it to TOG. When you have a digitalWrite(pin, TOG); statement, the value of the pin will flip to its alternate state.
Here is blink in its most simple state:
|
|
Note: I’ve always been surprised that Arduino didn’t implement this command as it is a simple single statement (and single clock cycle command) within the AVR microcontrollers. Here are the details as to how it is performed.
Additional Ways#
While digitalWrite() is the most obvious function to make a pin HIGH or LOW, there are other functions which provide a similar capability:
- analogWrite() - will make a pin HIGH or LOW for a period of time or frequency, based on its parameters
- tone() - will make a pin HIGH or LOW for a specific frequency which corresponds to a musical note (or tone)