Updated: Where I describe the different options for using a serial monitor and the serial software in AVR_C and change my recommended programs.
Introduction#
CoolTerm appears to be malware on some systems and PuTTY, its important to install from the proper site, has better security. PLEASE ENSURE YOU DOWNLOAD IT FROM THIS SITE ONLY: https://freeware.the-meiers.org/
For macOS, I do likeSerial, however, this is a $40 serial program. For free, the solutions is tio, which can be easily installed using Homebrew or CoolTerm.
Serial communications is a great low-cost way to communicate with the Uno. The USB cable which supplies power is also capable of communicating with the microcontroller. Each operating system has a variety of applications capable of providing serial communications.
All Platforms - Arduino IDE Serial Monitor#
Arduino IDE Serial Monitor works for communicating with the Uno. As stated before, installing the Arduino IDE is great for debugging any issues between your PC and the Uno. The Arduino Serial Monitor isn’t without its issues. It has a clunky interface, which requires a different field to enter data as to receiving the data.
I recommend using the Serial Monitor initially to test the Uno serial connection. You start the monitor by one of the following options:
- Arduino IDE -> Tools -> Serial Monitor
- Shift-Control-M or Command-M
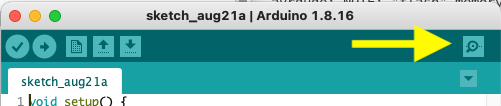
- Clicking the icon in the upper right corner of the IDE. (See image below)
Arduino IDE Serial Monitor Icon
Once the Serial Monitor is running, it needs to be setup properly. Make sure the correct port is in the upper left-hand corner, the “No line ending” is selected and the baud rate is 250000:
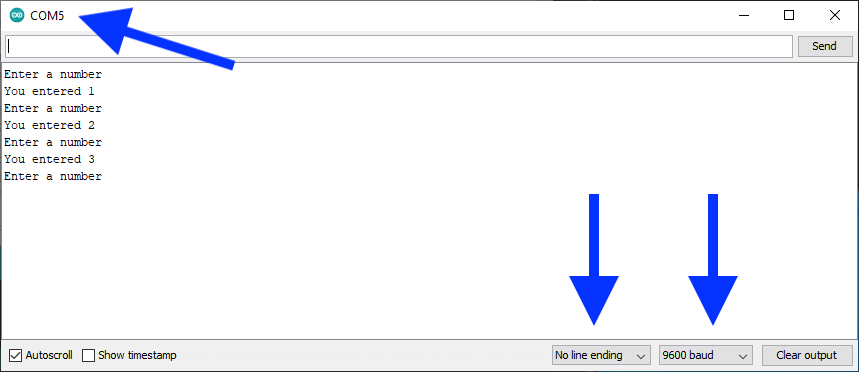
Check port, line ending and baud rate
The issue with the Serial Monitor is that it needs to be closed, every time you want to upload code to the Uno. If it isn’t closed, you will have an error such as this one:
make flash
avrdude -c Arduino -p atmega328p -F -V -P /dev/cu.usbmodem4201 -b 115200 -U flash:w:main.hex
avrdude: ser_open(): can't open device "/dev/cu.usbmodem4201": Resource busy
avrdude: opening programmer "Arduino" on port "/dev/cu.usbmodem4201" failed

avrdude done.  Thank you.

make: *** [flash] Error 1
Using PuTTY with Windows#
To view the output of the program, you will need to use a serial monitor program. A good one for Windows is Putty. Be sure to ONLY use the one from this website! The best way to ensure you are getting the right PuTTY program is to install from the Microsoft Store. Make sure the PuTTY entry looks like the one below. (Note the name Simon Tatham and the icon of two PC’s).
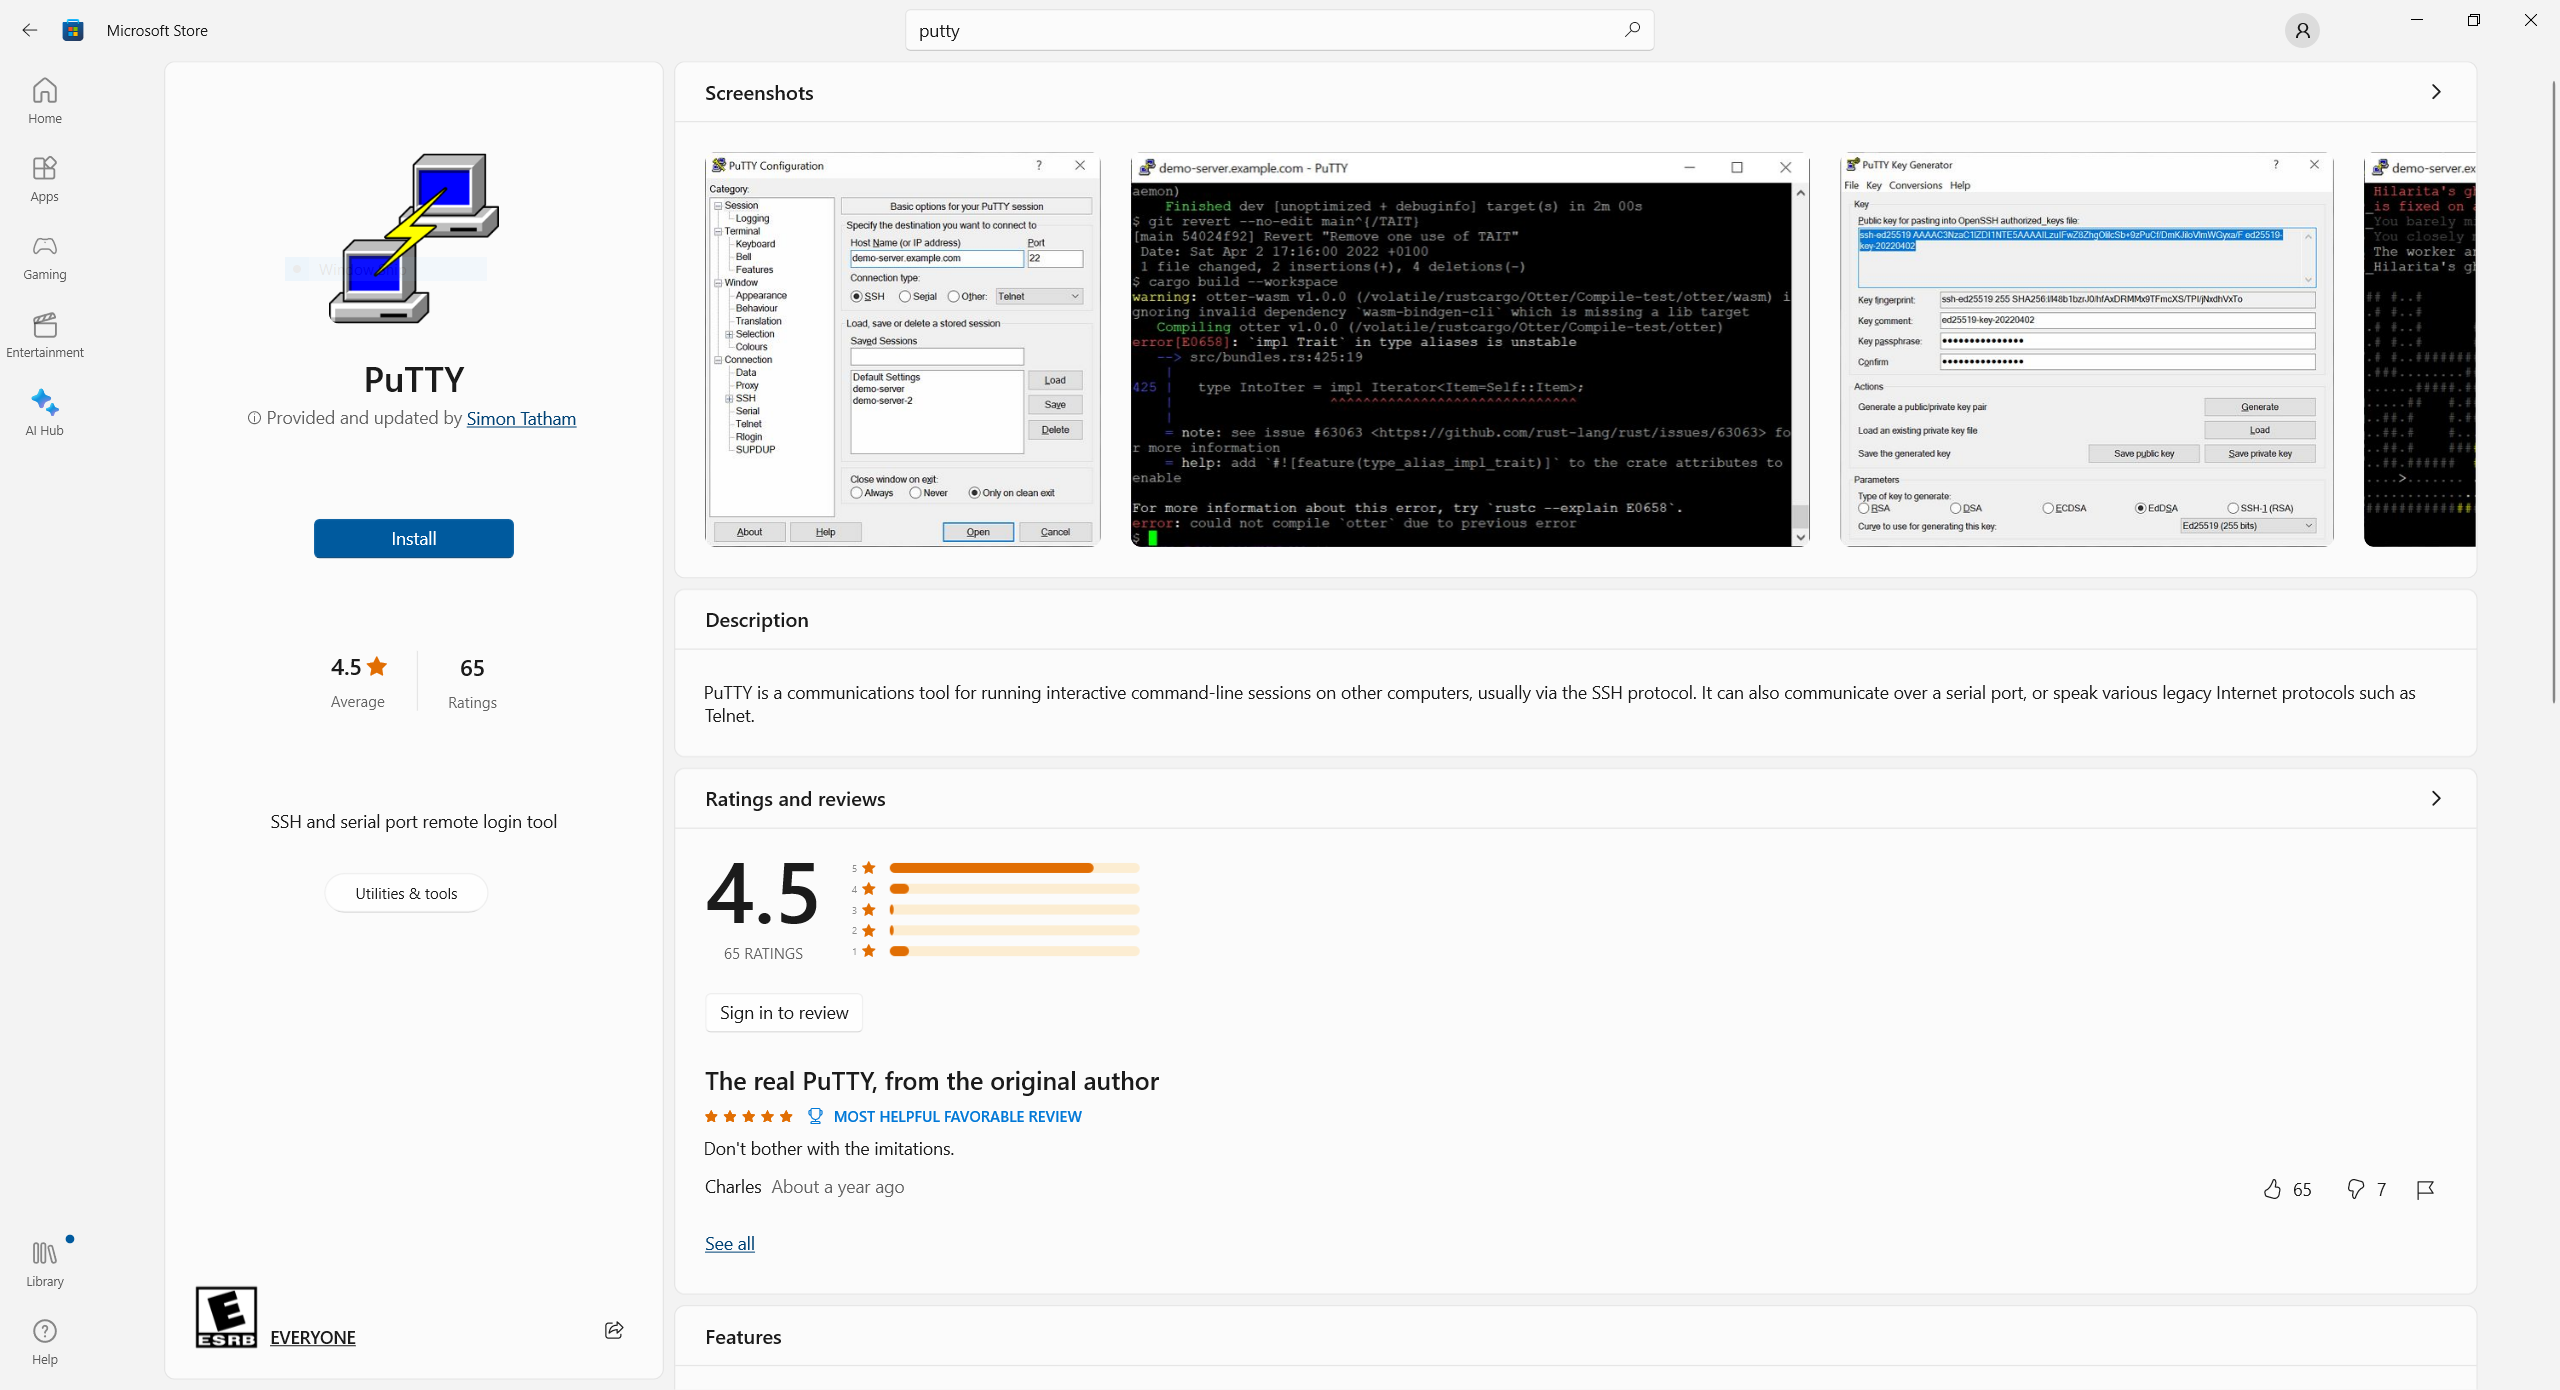
Store version of PuTTY
Once downloaded and installed, you will need to determine the COM port number being used. Use the one you found with the Arduino IDE. Be sure to change the Speed to 250000 (not 115200, as in the image) and click the radio button “Serial”.
You can also unplug/replug the Uno and the port which disappears and reappears in the PuTTY window is the COM port you want to use. Or one more method, shown in the image, is to use Windows Search to go to the Device Manager, then go to Ports(COM & LPT), and this will show the Uno port number.
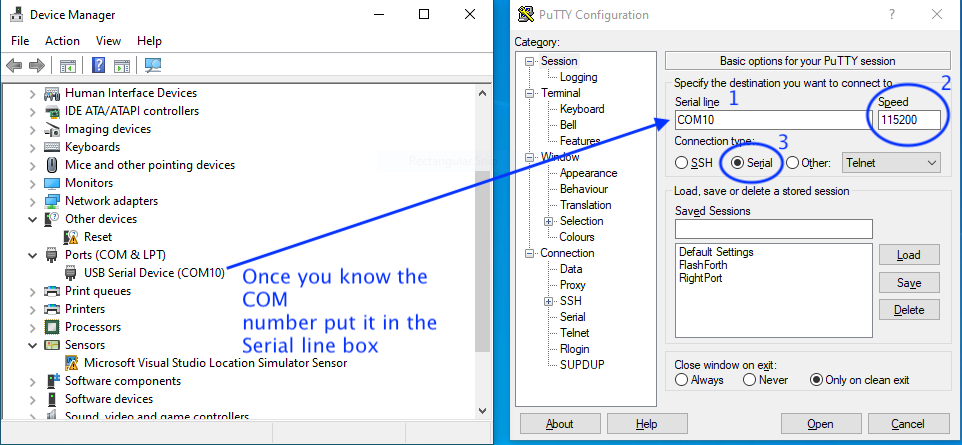
Follow 1-2-3 in Putty
Using tio with macOS and Linux#
To install tio, use your appropriate package manager. For macOS, I use Homebrew.
brew install tioTo run tio, connect your Uno to your computer and:
# easy way to list your connected devices
tio -l # lowercase l as in leo
# look for a device which doesn't have bluetooth in the name or the one you found using the Arduino IDE
# connect to your Uno (your device will be different)
tio -b 250000 /dev/cu.usbserial-01F4D348

# once in tio:
# to quit tio enter "Ctrl-t q"
# for help enter "Ctrl-t ?"
Using tio is similar to Arduino Serial Monitor, as you will need to exit tio, every time you want to upload code. This isn’t as bad, as tio will run in the same Terminal window, in which you run make flash. So it becomes second nature to:
- Ctrl-t q to quit tio
- up-arrow (twice) to get make flash, allow the code to upload
- up-arrow (twice) to re-play the tio command
Ultimately, if you use tio a great deal, you can setup a config file in ~/.config/tio/config which looks like this:
[uno]
device =  /dev/cu.usbserial-AR0JYQQB
baudrate = 250000
color = 11
And run tio using this command:
tio unoYou can add different configurations using the [name] and tio name command, so you can easily switch between different boards. Use the man tio command to understand more about tio.
Note: As of August 24, 2023, I’ve been getting a “Error: select() failed (Bad file descriptor)” error as the last command of tio, as I quit tio. I haven’t been able to find a cause nor any solution, however, it doesn’t seem to cause problems. For now, ignore.
Resources on Serial Communications#
Baud Setting#
While the serial I/O capabilities are polling and not interrupt-based, I’ve found the baud rate can still be set quite high. This is of value when you are attempting to transmit a signficant amount of information such as in examples/pointers. I have successfully set the baud rate to the following speeds in env.make:
- 9600UL
- 76800UL
- 250000UL - this is the primary baud rate of all of my AVR projects
- 1000000UL
These values were selected after viewing the error values on page 199 of the ATmega328P datasheet. After changing the baud rate, its best to do a make LIB_clean && make all_clean && make flash to ensure everything has been updated. And make sure you have changed the baud rate of your serial program as well.